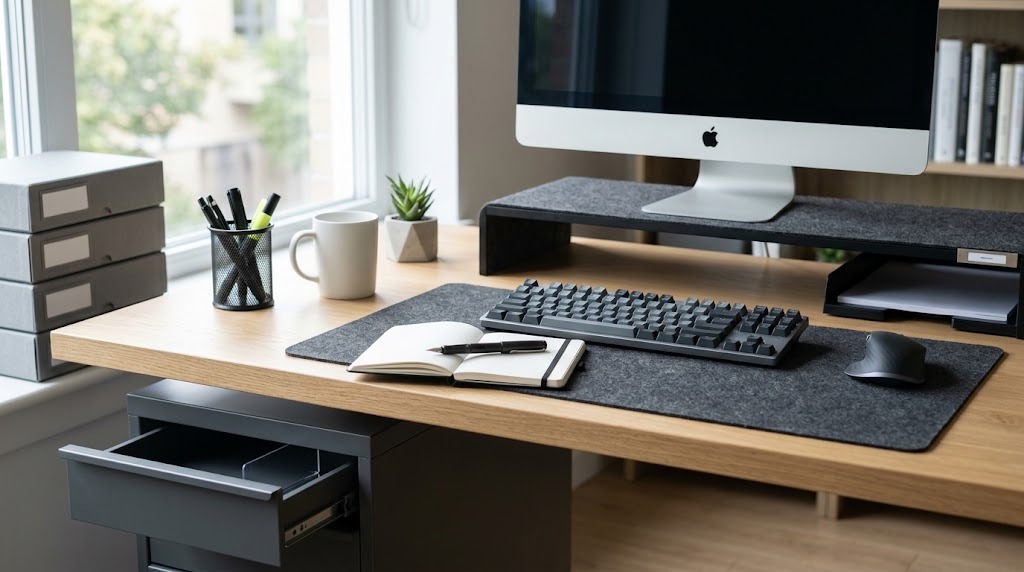
Office desk organization is the intentional, systematic arrangement of work tools, documents, and technology within a workspace to maximize productivity and reduce physical stress. By eliminating visual clutter and mapping items to ergonomic reach zones, professionals decrease cortisol levels, free up cognitive working memory, and streamline daily workflows.
Key Facts
- Cognitive load: Visual clutter directly competes with the brain’s processing capacity, increasing cortisol (stress) and causing rapid mental fatigue.
- Spatial mapping: Efficient desks divide into Primary (hourly), Secondary (daily), and Tertiary (weekly) reach zones governed by proximity and dominant hand.
- Time investment: A complete baseline desk reset requires 90 to 145 minutes using the standard five-step systematic methodology.
- Visual threshold: Personal items, plants, and decorations should never occupy more than 10% of the active horizontal desk surface.
- Cost baseline: Quality organizational infrastructure (monitor risers, document trays, under-desk cable management) typically ranges from $50 to $265 in total.
The Science of Visual Clutter
Visual clutter actively competes with the brain’s ability to pay attention and process information. According to 2011 fMRI research conducted by Sabine Kastner at the Princeton University Neuroscience Institute, multiple objects in a visual field force the brain to work harder to filter out distractions. The neural networks responsible for focus become exhausted when surrounded by disorganized stimuli.
An organized desk acts as a cognitive shield against this fatigue. Removing visual distractions and establishing clear homes for every item eliminates the micro-decisions required to locate tools. This reduction in cognitive friction translates directly to lowered cortisol levels, allowing the user to maintain deep work states for longer durations without experiencing premature mental exhaustion.
What Are the Ergonomic Reach Zones?
The ergonomic zone framework treats an office desk as a functional system governed by physical proximity and frequency of use. Arranging items according to these three structural zones prevents repetitive strain injuries, eliminates crossed-arm reaching, and maintains workflow momentum.
- Primary Zone (Immediate Reach): Items used hourly sit directly in front of the user. This includes the keyboard, mouse, active notepad, and primary smartphone. To comply with OSHA ergonomic baselines, this zone must allow a minimum under-desk clearance depth of 17.6 inches for the knees to prevent the user from leaning forward awkwardly.
- Secondary Zone (Arm’s Length): Items used daily, but not constantly, occupy this space. Reference documents, pens, calculators, and beverages belong here. Secondary tools should map to your dominant hand—right-handed users place pen cups and beverages on the right to prevent reaching across the body.
- Tertiary Zone (Extended Reach): Items used weekly or monthly sit at the periphery. Archived files, extra office supplies, and bulky tech cables belong in drawers, on overhead shelves, or in adjacent cabinets. Users should have to stand or fully pivot their chair to access this zone.
How to Organize a Desk in 5 Steps
Transforming a chaotic desktop into a high-performing workspace requires a sequential execution plan. Buying organizers before clearing the desk invariably leads to “organized clutter.” Follow this 90-to-145-minute process exactly.
Before You Start:
- Time Required: 90–145 minutes
- Materials Needed: Surface cleaner, microfiber cloths, trash bags, temporary sorting bins.
- Prerequisite: Dedicate a secondary surface (floor, bed, or adjacent table) as a staging ground.
Step 1: The Total Clear-Out
Remove every single item from the desk surface and all internal drawers, placing them onto your staging ground. Wipe the bare desk thoroughly with surface cleaner to physically and psychologically reset the workspace.
- Success Checkpoint: The desk is entirely empty, revealing the true surface area available.
Step 2: The Ruthless Purge
Sort the staged items into four explicit piles. Keep active tools and essentials. Relocate items belonging in the kitchen, garage, or another room. Archive tax documents, old notebooks, and past project files. Trash or recycle dead pens, dried-up sticky notes, and duplicate cables.
- Success Checkpoint: Only items essential to your actual job remain in the “Keep” pile.
Step 3: Establish Modular Zones
Return the “Keep” items to the desk by mapping them into the Primary, Secondary, and Tertiary zones. Position the primary monitor directly in front of the chair, roughly 20 to 24 inches away from the eyes. Bias secondary tools toward the dominant hand.
- Success Checkpoint: You can reach your keyboard, mouse, and active notepad without extending your elbows away from your torso.
Step 4: Containment and Cable Management
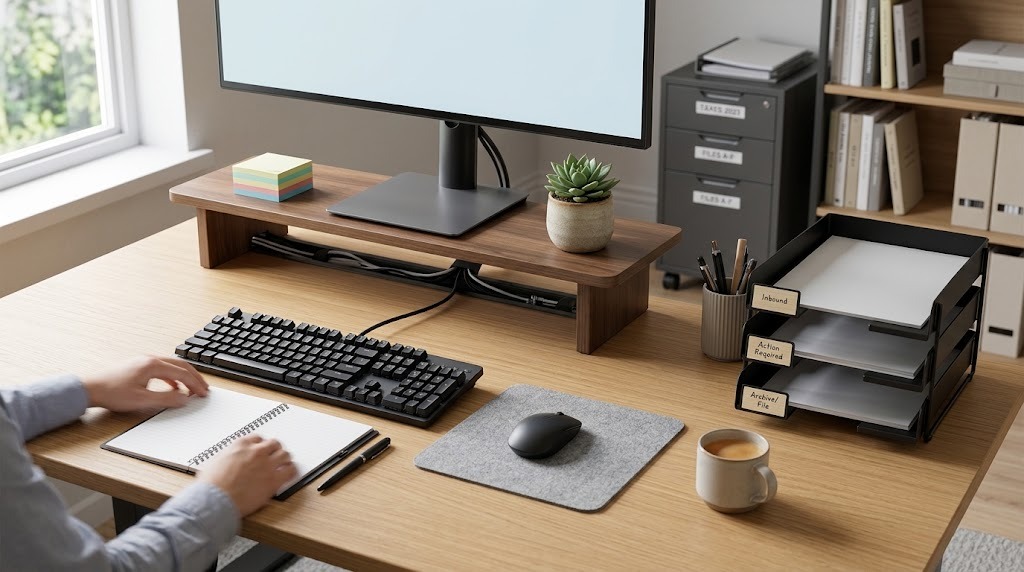
Route all power lines, display cables, and charger wires using under-desk trays or neoprene sleeves. Install structural organizers like monitor risers, grid drawer dividers, and document trays to contain the remaining items.
- Success Checkpoint: No loose cables are visible from a standing position in front of the desk.
Step 5: Label and Maintain
Label drawer sections or file folders where multiple items share a container. Establish a strict “5-Minute Evening Reset” protocol: clear all coffee cups, file active papers, and wipe the primary zone at the end of every workday.
- Success Checkpoint: The desk can be fully reset to its baseline state in under 300 seconds.
Office Desk Organization Styles
Choosing an organizational framework depends entirely on a user’s professional workflow, document handling volume, and available square footage.
| Organizational Type | ✅ Pros | ⚠️ Cons | Best Suited For |
| Minimalist (Hidden) | Zero visual clutter; maximum open space; rapidly cleanable surfaces. | Out of sight can mean out of mind; requires external closet storage. | Deep-focus workers, digital-only professionals, executives. |
| Maximalist (Modular) | High tactile accessibility; rapid tool switching; clear visual project cues. | High dust accumulation risk; visually distracting to others. | Creatives, artists, architects, paper-heavy professionals. |
| Vertical / Tiered | Saves premium horizontal surface area; utilizes dead wall space. | Can block natural light; unstable if heavy items sit too high. | Small offices, cubicles, narrow standing desks. |
What Are the Core Organizer Types?
Different desktop styles require specific organizational toolsets. Purchasing high-quality infrastructure prevents the system from breaking down during heavy workloads.
| Organizer Category | Specific Product Options | Key Metrics & Capacities | Typical Price Range |
| Desktop Storage | Monitor Risers, Desk Shelves | Height: 4–6 inches (ergonomic); Width: 20–42 inches. | $25 – $150+ |
| Document Management | Vertical Sorters, Letter Trays | Footprint: 9×12 inches per tray; Tiers: 3–5 slots. | $15 – $45 |
| Cable Management | Under-desk Trays, Sleeves | Tray Length: 16–36 inches; Clip capacity: 1–5 wires. | $10 – $35 |
| Modular & Drawer | Grid Dividers, Tech Pouches | Depth: 2–3 inches (standard drawer clearance). | $8 – $30 |
Which Setup Matches Your Workflow?
A perfectly organized desk fails if it fights the user’s actual daily tasks. Match the physical layout to the dominant work style.
The Deep-Focus / Digital Worker
Digital-first professionals require expansive, empty surfaces to minimize cognitive distraction. Keep a completely bare desktop except for the monitor, mouse, keyboard, and a single beverage. Use an under-desk cable management tray to hide all power bricks. Store all administrative items completely out of sight in an adjacent rolling filing cabinet.
The Creative / Multi-Project Manager
Professionals juggling physical assets and digital tools need layered accessibility. Utilize a premium wooden desk shelf or heavy-duty monitor riser. This creates a multi-layered system where active project folders, drafting tablets, or color swatches slide underneath the shelf, while the screen and secondary tool docks sit neatly on top without encroaching on the primary typing zone.
The Compact Workspace / Cubicle Worker
Users with desks under 48 inches wide must conquer vertical space. Implement pegboards mounted to the wall or cubicle partition to lift pen cups, headphones, and note pads entirely off the desk surface. This leaves the limited horizontal footprint entirely free for typing, writing, and mouse movement.
Fixing Common Organization Failures
Even strict systems break down when structural flaws exist in the initial setup. Address these specific friction points to maintain an organized office desk permanently.
- Issue: Paper perpetually piles up on the open desk surface.Fix: Implement the “One-Touch Rule” alongside a 3-tier desktop tray labeled Inbound, Action Required, and To File/Archive. Once a piece of paper is picked up, it must be placed into one of these three slots immediately—it is never allowed to lie flat on the open desk again.
- Issue: The desk looks organized, but visual distraction remains high.Fix: Audit the visual perimeter. Remove bright, highly patterned items from the direct forward field of view. Swap clear plastic storage containers for opaque bins to hide inner visual noise, and strictly enforce the 10% rule for personal decorations.
- Issue: Small tech accessories (dongles, flash drives) disappear constantly.Fix: Dedicate a shallow, 2-inch deep drawer tray lined with silicone or felt specifically for small adapters. Alternatively, mount an elastic gear organizer grid to the inside of a cabinet door.
- Issue: Sticking loose papers into drawers creates hidden chaos (The “Out of Sight” Trap).Fix: Never place loose paper directly into a drawer. Require that every drawer intended for documents houses a rigid hanging file system or modular grid dividers.
Frequently Asked Questions
How often should I do a complete desk reorganization?
Perform a complete 5-step desk reset once every quarter (every 90 days). While the “5-Minute Evening Reset” handles daily surface clutter, deep cleaning and purging archived files require a dedicated quarterly session to prevent tertiary zone bloat.
How do I hide thick laptop charging cables on a minimalist desk?
Use a combination of an under-desk J-channel wire raceway and magnetic cable clips. Run the thick power brick into the raceway mounted beneath the desk surface, using a single magnetic clip at the back edge of the desk to hold just the tip of the connector when the laptop is removed.
Does using dual monitors ruin desk organization?
Dual monitors do not ruin organization if mounted properly. Replacing dual factory monitor stands with a single heavy-duty VESA dual-monitor arm reclaims up to 30% of the desk’s horizontal surface area, instantly clearing the primary and secondary zones for other tools.
What is the best way to handle a desk with no built-in drawers?
Purchase a slim, rolling 3-drawer pedestal cabinet designed to slide underneath the desk. Alternatively, rely heavily on a tiered monitor riser for horizontal storage and utilize wall-mounted sorters to get daily tools off the main surface.