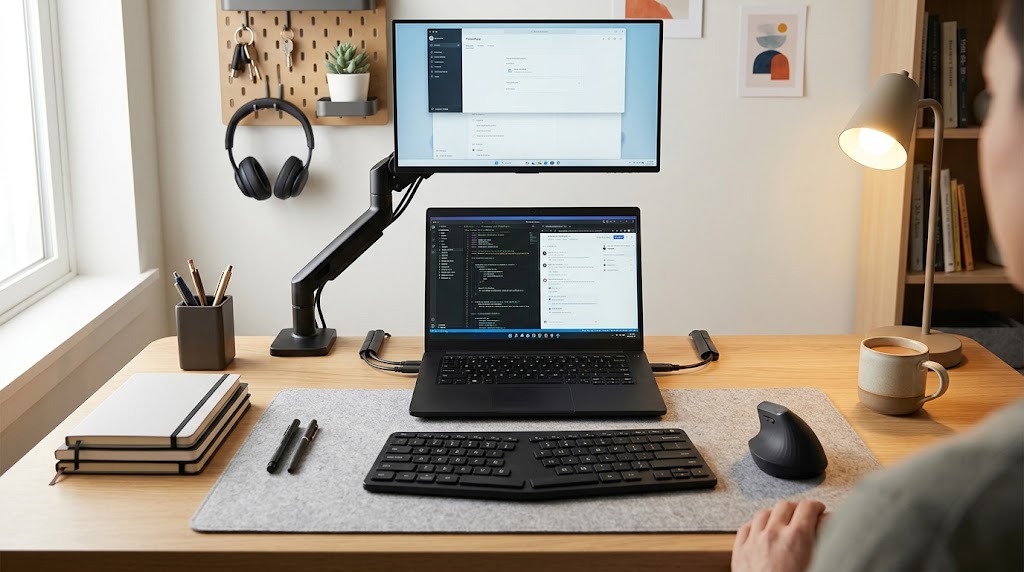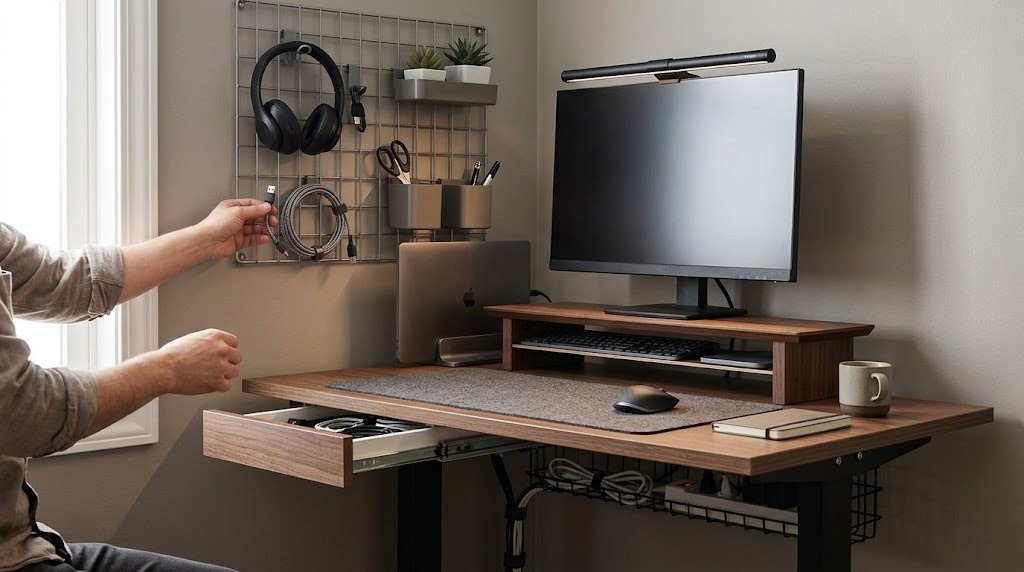
Learning exactly how to organize a desk requires a systematic approach to arranging workspace tools, technology, and documents to maximize cognitive focus. You can achieve this by executing a complete physical purge, categorizing your essential supplies, and mapping items into three distinct ergonomic reach zones based on daily usage frequency.
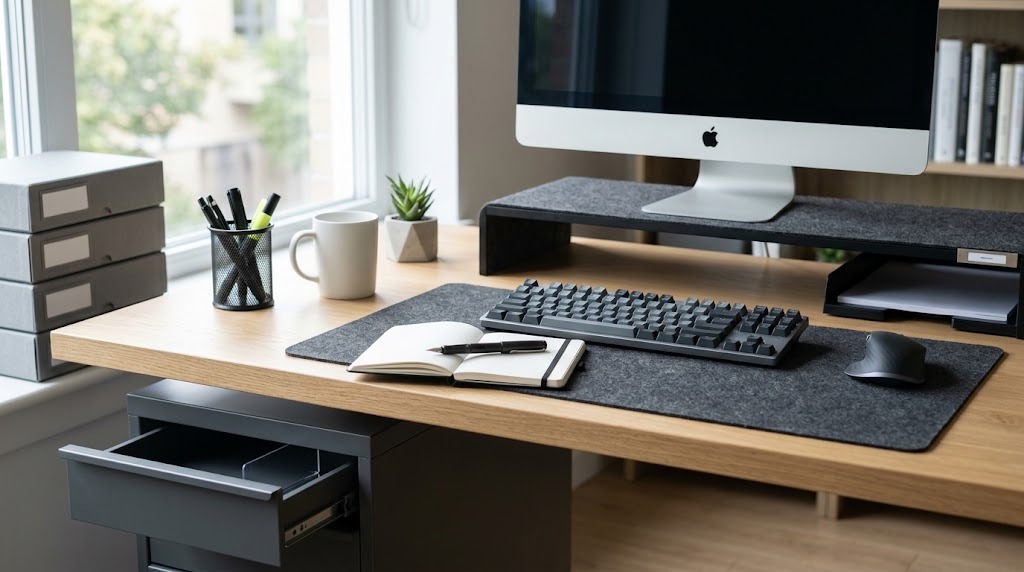
Key Facts / At a Glance:
- Initial desk organization requires 2 to 4 hours, followed by a mandatory 2-minute daily maintenance reset.
- Visual clutter actively competes for neural processing power in the brain’s visual cortex, measurably degrading working memory.
- The Primary Zone (active reach) must contain only your computer, input devices, and immediate task materials.
- Proper paper management requires shifting from vertical stacks to a strict 3-tray horizontal system: Inbox, Action, and Archive.
- Industry ergonomic standards (ANSI/BIFMA) mandate that seated desk heights sit between 22.6 and 48.7 inches to maintain a neutral posture.
Why Does Visual Clutter Destroy Cognitive Focus?
Visual clutter destroys cognitive focus by forcing the brain’s visual cortex to process multiple competing stimuli simultaneously, which suppresses its response to any single item. The problem is neurological, not aesthetic. Functional MRI research from the Princeton Neuroscience Institute demonstrates that multiple objects in a visual field create mutually suppressive signals, draining the cognitive bandwidth required for sustained attention.
The proximity of the clutter amplifies this cognitive drain. Objects situated closer to your central point of focus interfere significantly more than items at the periphery of your vision. Furthermore, unresolved tasks left on a desk—such as a stack of unsorted mail or a sticky note regarding an overdue project—generate “attentional residue”. This psychological phenomenon quietly consumes working memory on an ongoing basis, even when you are not actively looking at the items.
How to Organize a Desk Using the 4-Step Method
Before You Start
- Total Time: 2 to 4 hours for the initial overhaul.
- Difficulty: Moderate (requires physical lifting and decision-making).
- Estimated Cost: $0 to $500+ depending on hardware upgrades.
- Required Materials: Microfiber cloths, surface-safe all-purpose cleaner, trash bags, recycling bins, and a staging area (floor or nearby bed).
- Prerequisite: Turn off and unplug all electronic hardware to prevent accidental damage or data loss during the purge.
Step 1: Execute the Total Workspace Purge
Clear every single item from the desk surface, drawers, monitor stands, and surrounding shelves. Transfer all items to a designated staging area away from the desk. Wipe the bare desk surface with a microfiber cloth and a gentle all-purpose cleaner to remove dust, coffee rings, and accumulated debris.
- Exact Specifics: Use isopropyl alcohol to target stubborn ink stains, but avoid abrasive chemicals on finished wood surfaces. Vacuum the interior of all drawers.
- Success Checkpoint: You will know this step is complete when the desk is entirely barren and the surface is chemically clean.
- Common Mistake: Leaving the heavy monitor or keyboard on the desk. You must remove everything to accurately assess your available square footage and route cables properly.
Step 2: Categorize and Group Your Inventory
Sort the items in your staging area into four definitive actions: Keep, Relocate, Donate/Recycle, and Trash. For the items designated as “Keep,” group them into the following specific functional categories:
- Tech & Power: Cables, charging bricks, USB hubs, external hard drives, and input devices.
- Analog Writing: Pens, pencils, markers, styluses, and highlighters.
- Paper Management: Notebooks, loose reference documents, mail, and sticky notes.
- Tools & Fasteners: Scissors, staplers, paperclips, and tape dispensers.
- Personal Comfort: Lip balm, tissues, water bottles, and blue-light glasses.
- Exact Specifics: Limit personal sentimental items (photos, toys) to a strict maximum of three. Limit pens to your three best-performing instruments; discard the rest.
- Success Checkpoint: You will know this step is complete when you have distinct, categorized piles and the trash/relocate items have physically left the room.
- Common Mistake: The “Everything is Important” fallacy. If you do not touch an item at least once every two hours, it does not belong in your immediate workspace.
Step 3: Map the 3-Zone Ergonomic System
Assign locations for your remaining items based on a physiological framework that minimizes physical reach times and joint strain. Establish a workstation that allows your body to remain in a “neutral working posture,” as defined by the Occupational Safety and Health Administration (OSHA).
- Exact Specifics:
- Primary Zone (Active Reach): The arc your forearms sweep across without moving your elbows away from your torso. Place only your keyboard, mouse, and active daily notebook here. Adjust the keyboard height to 22.0–26.8 inches to ensure wrists remain straight.
- Secondary Zone (Extended Reach): The area accessible by extending your arms fully from the shoulder. Place your pen cup, beverage, secondary monitor, and active physical reference trays here.
- Tertiary Zone (Storage): The furthest edges of the desktop and the drawers underneath. Store archival paperwork, backup drives, and surplus office supplies here.
- Success Checkpoint: You will know this step is complete when you can type, use your mouse, and take notes without leaning forward or lifting your elbows from a 90-degree angle.
- Common Mistake: Placing smartphones in the Primary Zone. This invites visual crowding and constant context-switching. Move the phone to the Secondary Zone or off the desk entirely.
Step 4: Implement Storage and Containment Frameworks
Deploy specific hardware to contain your categories and build vertically. Choose between open storage (pegboards, trays) for high-frequency items and closed storage (drawers, opaque boxes) to eliminate visual clutter.
- Exact Specifics: Insert acrylic or mesh organizers into drawers to stop items from shifting. Mount a monitor riser to elevate your screen so the top line of text sits directly at eye level, which prevents cervical neck strain. Slide your keyboard under the riser when reviewing physical documents.
- Success Checkpoint: You will know this step is complete when every item has an assigned, contained home and opening a drawer does not cause items to roll or mix.
- Common Mistake: Buying organizers before purging. Purchasing bins first simply results in organizing your trash.
Which Desk Setup Type Should You Choose?
Your desk organization framework must align with your primary daily activity. A setup optimized for coding will actively hinder someone reviewing physical legal briefs.
| Setup Type | Target User Persona | Core Framework | Key Hardware Investments |
| The Digital Minimalist | Software Developers, Writers, Analysts | Strictly digital workflow; zero visible paper. Relies heavily on under-desk routing. | Hidden under-desk cable cage, single large felt desk mat, clamp-on monitor arm. |
| The Analog Professional | Lawyers, Accountants, Academics | Dual-zone surface layout prioritizing a physical document review area alongside a digital input zone. | Tiered horizontal paper trays, vertical file organizers, adjustable task lighting. |
| The Ergonomic Power User | Remote Workers, Data Scientists | Dynamic mobility based on the Cornell University “20-8-2” sit-stand rhythm. | ANSI/BIFMA X5.5 certified height-adjustable standing desk, articulating dual-monitor arms. |
The Digital Minimalist
Choose this setup if your output is entirely software-based and visual clutter severely impacts your focus. Skip this setup if your daily workflow requires referencing physical books, reviewing printed contracts, or sketching by hand. Closed storage is paramount here to maintain a pristine aesthetic.
The Analog Professional
Choose this setup if you must cross-reference physical documents with digital records. Skip this setup if you struggle with paper hoarding. This setup utilizes open desktop organizers, which are excellent for immediate access but consume the valuable surface area required by digital-first workflows.
The Ergonomic Power User
Choose this setup if you spend upwards of 8 hours a day at your desk and suffer from musculoskeletal fatigue. Skip this setup if you are on a strict budget under $200. This configuration requires investing in heavy-duty engineering controls to facilitate a neutral working posture.
How Much Does a Desk Organization System Cost?
Desk organization scales from free behavioral changes to professional-grade architectural investments.
- Low Budget ($0 – $30): Relies on DIY solutions and repurposing household items. You can use cleaned mason jars for pens, wrap cardboard shoeboxes in craft paper to use as drawer dividers, and utilize binder clips to route cables along the back edge of the desk.
- Mid-Range ($50 – $150): Upgrades the workspace with functional consumer goods. This budget accommodates a comprehensive acrylic drawer organizer set, a standard polyurethane desk mat, a basic under-desk cable management tray, and a wooden monitor riser with built-in cubbies.
- Premium ($200 – $500+): Implements industrial-grade hardware for maximum longevity. This includes modular magnetic desk mat systems, solid hardwood desktop shelves, articulating gas-spring monitor arms, steel under-desk mobile filing cabinets, and heavy-duty metal pegboards.
Common Desk Organization Mistakes and How to Fix Them
The “Dumping Ground” Effect
Desks placed near entryways naturally accumulate incoming mail, keys, and coffee cups.
- The Fix: Enforce a physical boundary. Place a decorative plant, a dedicated “inbox” tray, or a strict edge-marker on the exact spot where clutter lands. This physical intervention breaks the subconscious habit of dumping non-work items.
The Paper Pile Build-Up
Loose papers stack up vertically until the bottom documents are forgotten and the stack topples.
- The Fix: Shift from a vertical accumulation stack to a horizontal 3-tray system. Label the trays strictly as Inbox (needs review), Action (working on it today), and Archive (needs filing). Paper must exist in one of those three states; it cannot sit loosely on the desk surface.
Ignoring Cable Management
Leaving a spiderweb of power cords under the desk traps dust, creates visual chaos, and risks hardware damage if a foot catches a wire.
- The Fix: Mount a wire mesh cable tray to the underside of the desk. Route all peripheral cables along the monitor arms using velcro ties, drop them directly into the tray, and run a single heavy-duty power strip cord to the wall outlet.
Frequently Asked Questions
How often should I clean my desk surface?
You should wipe down the physical desk surface once a week to remove dust and oils. However, you must perform a 2-minute “maintenance reset” at the end of every single workday. This involves putting pens back in cups, closing tabs, and returning the keyboard to its resting position so you start the next morning with a blank slate.
Where is the best place to put a phone on a desk?
Place your phone out of your primary line of sight, ideally on a designated charging stand in the Secondary Zone or inside a drawer. The visual presence of a smartphone acts as a severe cognitive distraction, continually splitting your focus even when the screen is dark.
How do I organize a desk without any drawers?
If your desk lacks built-in drawers, you must build vertically. Utilize clamp-on desktop pegboards to hold supplies, install a monitor riser equipped with under-shelf storage cubbies, or purchase a slim, rolling 3-tier utility cart to station immediately next to your chair for tertiary storage.
What is the most effective way to manage cables?
The most effective way to manage cables is to aggregate them off the floor. Mount a power strip directly to the underside of the desk surface. Use neoprene cable sleeves to bundle wires traveling in the same direction, and secure them to the desk legs using adhesive cable clips or reusable velcro ties.
How do I maintain my system once I know how to organize a desk?
To maintain your system permanently, adopt the “One In, One Out” rule for office supplies and respect the spatial zones. Never place a new item on the desk without removing an old one. Conduct a deep 15-minute reset every Friday afternoon to file archive papers and re-establish the baseline organization before the weekend.