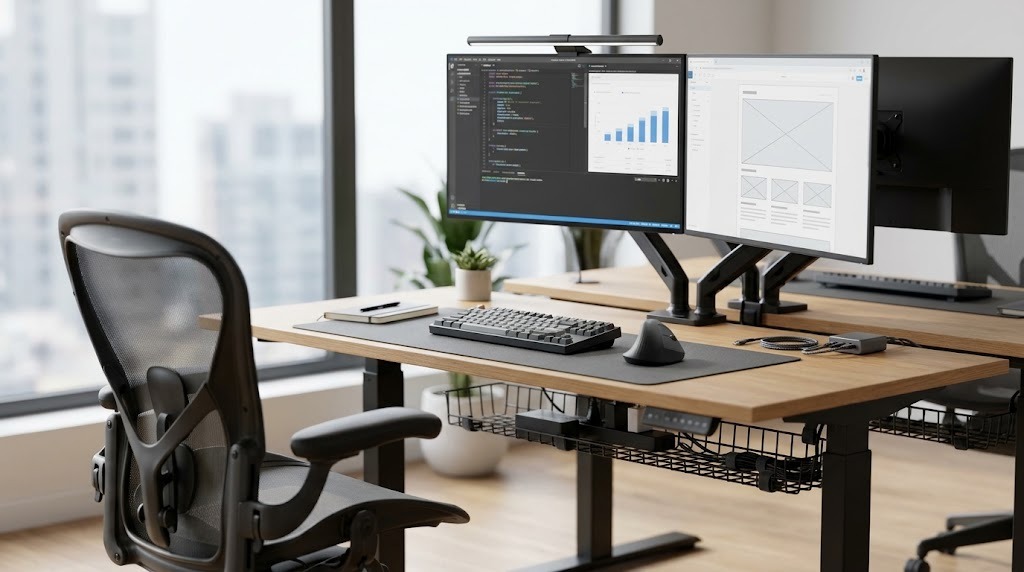
A complete desk essentials checklist is an operational inventory of ergonomic, mechanical, computational, and environmental tools systematically arranged to eliminate physical strain and cognitive friction. Rather than assembling a random assortment of office accessories, an optimized desk coordinates physical surfaces, input peripherals, optical alignment, and cable pathways into an integrated productivity station.
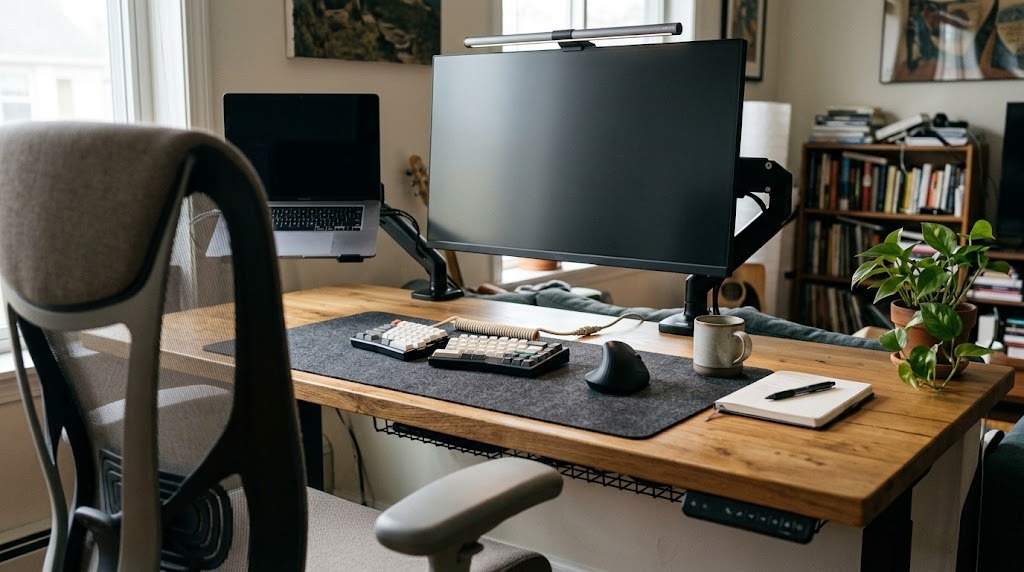
┌─────────────────────────────────────────────────────────────────────────────┐
│                            KEY FACTS: AT A GLANCE                           │
├─────────────────────────────────────────────────────────────────────────────┤
│ • Primary Reach Zone (Strike Zone): Extends 35 to 45 cm from the torso;     │
│   reserved strictly for high-frequency input devices (keyboard, mouse).     │
│ • Optical Target: The top third of your display glass must align directly   │
│   with horizontal eye level, tilted 10° to 20° backward at arm's length.    │
│ • Dynamic Sit-Stand Cadence: Follow the Cornell 20-8-2 protocol: 20 minutes │
│   sitting, 8 minutes standing, and 2 minutes moving or stretching.          │
│ • Task Illumination Standard: Surface illumination should reach 500 lux     │
│   with a Color Rendering Index (CRI) Ra ≥ 95 to prevent ocular fatigue.     │
│ • Neutral Posture Target: Elbows flexed between 90° and 105°, wrists flat   │
│   in zero ulnar deviation, feet anchored flat with hips tilted slightly up. │
└─────────────────────────────────────────────────────────────────────────────┘
What Is an Optimized Desk Ecosystem?
An optimized desk ecosystem is an intentional arrangement of physical furniture, computing hardware, and micro-climate controls calibrated to the user’s exact anthropometric dimensions. It eliminates repetitive micro-movements, prevents sustained musculoskeletal loading, and clears visual clutter that drains executive function.
Standard consumer setups often force the body to adapt to the furniture: workers stoop over fixed-height tables, compress wrist nerves against hard surface edges, and suffer chronic optical convergence fatigue under uneven lighting. A professional desk ecosystem reverses this dynamic. Every tool—from the mechanical gas-spring monitor arm to the under-desk grounding raceway—adapts the working environment to maintain your musculoskeletal system in a neutral, strain-free alignment.
How Does Ergonomic Desk Zoning Optimize Workflow?
Ergonomic desk zoning applies industrial kinetic principles to desk surfaces, dividing your desktop into three concentric semicircular planes centered on your torso. Organizing items by access frequency minimizes repetitive reach extensions—one of the leading contributors to shoulder impingement and cervical spine strain.
                    [ BACK WALL / MONITOR AXIS ]
  ─────────────────────────────────────────────────────────────────
  ZONE 3: NON-WORKING / REFERENCE ZONE (Vertical & Perimeter Space)
   • Monitor Arms   • Light Bars   • Audio Monitors   • Plants
  ─────────────────────────────────────────────────────────────────
       ZONE 2: SECONDARY REACH ZONE (Full Arm Extension: 50–70 cm)
        • Webcams   • Hydration   • Microphones   • Scratchpads
  ─────────────────────────────────────────────────────────────────
         ZONE 1: PRIMARY STRIKE ZONE (Forearm Sweep: 35–45 cm)
               [ KEYBOARD ]    [ MOUSE / TRACKPAD ]
  ─────────────────────────────────────────────────────────────────
                         [ USER TORSO ]
Zone 1: The Primary Reach Zone (The Strike Zone)
The Strike Zone spans a radius of 35 to 45 centimeters across the front plane of your work surface, accessible by sweeping your forearms horizontally with elbows pinned lightly to your sides.
- Permitted items: Primary input devices (split or standard keyboard, mouse, or trackpad) and active handwriting documents.
- Operational rule: If an object is not touched at least once every ten minutes, clear it from this zone immediately.
Zone 2: The Secondary Reach Zone
The Secondary Reach Zone extends 50 to 70 centimeters from your body, reached by extending your arm from the shoulder without bending your waist or rounding your thoracic spine.
- Permitted items: Displays, desktop task lights, hydration vessels, secondary hardware control decks, active reference material, and boom-mounted communication peripherals.
- Operational rule: Items here must be liftable with one hand without shifting your hip position in your chair.
Zone 3: The Non-Working and Perimeter Zone
The Non-Working Zone encompasses the outer margins of the surface beyond 70 centimeters, along with vertical zones mounted to wall tracks, pegboards, or clamped desk risers.
- Permitted items: External backup arrays, active charging stations, uninterrupted power supplies (UPS), desk plants, and secondary reference manuals.
- Operational rule: Use this zone to route technical utility pathways (such as monitor poles and power distributions) away from your line of sight.
The Complete Desk Essentials Checklist: Foundation to Peripherals
Building an efficient desk ecosystem requires an ordered operational framework. Use this checklist to build, upgrade, or audit your workspace.
DESK ESSENTIALS AUDIT CHECKLIST
───────────────────────────────────────────────────────────────────
PHASE 1: THE ERGONOMIC FOUNDATION
 [ ] Foundation Desk (Dual-motor standing desk, 75+ kg dynamic capacity)
 [ ] Active Task Chair (Synchro-tilt mechanism, adjustable 4D armrests)
 [ ] Anti-Fatigue Topography Mat (High-density polyurethane, calculated ridges)
 [ ] Ergonomic Footrest (Optional; required if desk cannot lower to elbow height)

PHASE 2: COMPUTING & DISPLAY INFRASTRUCTURE
 [ ] Heavy-Duty Gas-Spring Monitor Arm (VESA 75/100, integrated cable track)
 [ ] External Color-Calibrated Display (IPS/OLED panel, anti-glare matte finish)
 [ ] Universal Thunderbolt 4 / USB4 Docking Station (Single-cable 100W PD)
 [ ] Laptop Vertical Riser / Staging Stand (Open frame for passive convection)

PHASE 3: INPUT PERIPHERALS & COGNITIVE TOUCHPOINTS
 [ ] Ergonomic Keyboard (Split-tenkeyless or ortho-linear layout)
 [ ] Ergonomic Pointing Device (Vertical mouse or precision balance trackball)
 [ ] Microfiber / High-Density Wool Felt Desk Mat (Edge-stitched, 900x400 mm)
 [ ] Mechanical Key Switches Calibrated to Typing Force (45–60g actuation)

PHASE 4: CABLE ARCHITECTURE & POWER TOPOLOGY
 [ ] Under-Desk Cable Management Raceway (Fold-down wire tray or steel trough)
 [ ] Commercial-Grade Surge Protector Strip (Integrated 15A circuit breaker)
 [ ] Braided Cable Sleeving & Industrial Hook-and-Loop Straps (Cut-to-fit)
 [ ] Articulating Vertical Cable Spine (Secures umbilical drop to floor outlets)

PHASE 5: OPTICAL ILLUMINATION & ENVIRONMENTAL SYSTEM
 [ ] Asymmetrical Monitor Light Bar (Zero specular glare, Auto-dimming sensor)
 [ ] High-CRI Task Fill Light (Ra ≥ 95, 2700K–6500K CCT adjustable range)
 [ ] Desktop Acoustic Absorber / Desk Privacy Screen (NRC ≥ 0.70 rating)
 [ ] Direct Air Quality Monitor or HEPA Air Scrubber (Sub-micron particulate)
───────────────────────────────────────────────────────────────────
1. The Ergonomic Foundation
Your desk and chair form the mechanical base of your workspace. They directly dictate your spinal curvature, breathing volume, and muscular tension.
        NEUTRAL POSTURE ANTHROPOMETRIC PROFILE

               [Horizontal Gaze: 0°]
                        │ \
                        │  \  10°–20° Tilt
                        │   \
            ┌───────────┴────▼────────┐
            │ TOP THIRD OF MONITOR    │
            └─────────────────────────┘
                        ▲
                        │ ~50–75 cm (Arm's Length)
                        ▼
     (90°–105°) [Elbows at Home Row]
        ┌────► ═══════════════ [Desk Surface]
        │              ▲
        │              │ Neutral Forearm Clearance
        ▼              ▼
     (90°–105°) [Open Hip Angle]
        │
        ▼
     (90°) ────► [Knees Level With Hips]
        │
        ▼
     [Feet Grounded / Angled Footrest]
Height-Adjustable vs. Fixed-Height Desks
A quality height-adjustable desk uses dual three-stage electric lifting columns driven by synchronized internal motors.
- Lifting capacity and stability: Insist on a minimum dynamic load capacity of 100 kilograms (220 pounds) to hold multiple monitors, steel arms, and desktop hardware without motor strain.
- Frame thickness: Look for 2 mm cold-rolled steel box columns. Single-motor desks with connecting hex-drive rods flex under load and introduce noticeable horizontal wobble at heights above 100 centimeters.
- Minimum height requirements: Many fixed-height commercial desks sit at a rigid 74 centimeters (29 inches). This default is ergonomically incorrect for approximately 80% of adult workers, forcing shorter individuals to elevate their shoulders into chronic trapezius spasm. Your desk frame must adjust down to 62 centimeters (24.5 inches) or lower for a truly neutral typing height.
Ergonomic Seating Mechanics
An ergonomic task chair should keep your body in an active, balanced posture rather than locking it into a stiff, 90-degree box.
- Synchro-tilt mechanisms: Choose chairs where the backrest reclines at a 2:1 ratio relative to the seat pan. This opens your hip flexors and preserves natural lumbar lordosis without lifting your feet off the floor.
- 4D armrests: Armrests must adjust across four axes: height, depth, width, and pivot angle. They should rest lightly beneath your forearms without pushing your clavicles upward or bumping into the front edge of the desk.
- Material mechanics: Pellicle elastomeric mesh (found on the Herman Miller Aeron) distributes weight evenly across your ischial tuberosities (sitting bones) and dissipates heat. High-density molded foams with contour cutouts remain superior for users needing firm, consistent pelvic cradling.
2. Input Devices, Displays, and Core Computing
Input devices and displays handle the primary cognitive and physical workload at your desk. Poor alignment here quickly leads to ocular fatigue, tension headaches, and repetitive strain injuries like carpal tunnel syndrome.
               DISPLAY AND PERIPHERAL TOPOLOGY

             ┌─────────────────────────────────┐
             │       MONITOR LIGHT BAR         │
             └────────────────┬────────────────┘
                              │ Asymmetrical Beam
                              ▼
             ┌─────────────────────────────────┐
             │                                 │
             │       COLOR-ACCURATE PANEL      │
             │         (100% sRGB / DCI-P3)    │
             │                                 │
             └────────────────┬────────────────┘
                              │ VESA 75/100 Mechanical Gas Arm
                              ▼
    [THUNDERBOLT 4 DOCK] ──── USB-C ────► [NOTEBOOK WORKSTATION]
             │
             ├── DisplayPort 1.4 ───────► (To Monitor)
             ├── USB-A 3.2 ─────────────► [DAC / Audio Interface]
             └── Power Delivery (100W) ─► (Downstream Wall Power)
Optical Display Placement and Monitor Arms
- Height calibration: The top third of your display glass must align directly with your horizontal gaze. Gazing downward more than 15 degrees curves the cervical spine, increasing the effective weight of your head on your neck muscles from 5 kg to over 20 kg.
- Viewing distance: Position the panel roughly an arm’s length away (50 to 75 centimeters), matching the focal distance of your relaxed eyes.
- Articulating monitor arms: Mount your screen on an independent, gas-spring or mechanical-counterbalance monitor arm rated for your monitor’s weight. Securing screens with a heavy-duty C-clamp clears up to 40% of usable surface space underneath, opening valuable real estate in Zone 2.
Ergonomic Keyboards and Pointing Peripherals
- Ergonomic keyboards: Standard rectangular keyboards force your hands into pronation, ulnar deviation, and wrist extension. Split mechanical keyboards or fixed ergonomic designs (like the Kinesis Advantage or Microsoft Sculpt) allow your hands, wrists, and shoulders to rest in natural alignment. Look for linear or light tactile switches that actuate with 45 to 50 grams of force to reduce repetitive finger-strike shock.
- Vertical mice and trackballs: Traditional flat mice force your forearm bones (radius and ulna) to cross, compressing the carpal tunnel. Vertical pointing devices (such as the Logitech MX Master series or Evoluent VerticalMouse) rotate your forearm into a neutral handshake posture, shifting movement from the small wrist tendons to the larger muscle groups in your arm and shoulder.
3. Illumination and Environmental Controls
Workspace lighting directly impacts eye strain and your circadian rhythms. Poorly planned lighting causes pupil strain, reflections on glass screens, and late-day fatigue.
                  DESKTOP ILLUMINATION VECTORS

                        [MONITOR LIGHT BAR]
                                │  \
        Diffused Task Path      │   \  Shielded Cutoff (No Direct Eye Glare)
                                │    ▼
                                │   [SCREEN FACE: 0 LUX SPECULAR GLARE]
                                ▼
                       ═════════════════════════
                       [DESK SURFACE: 500+ LUX]
Asymmetrical Monitor Light Bars vs. Traditional Lamps
A monitor light bar mounts directly to the top edge of your display housing. Unlike standard reading lamps, it uses an internal parabolic reflector to cast an asymmetrical sheet of light downward across your desk space.
┌───────────────────────────┬───────────────────────────┬───────────────────────────┐
│ SPECIFICATION METRIC      │ ASYMMETRICAL LIGHT BAR    │ TRADITIONAL GOOSENECK LAMP│
├───────────────────────────┼───────────────────────────┼───────────────────────────┤
│ Screen Glare / Reflection │ Zero Specular Reflection  │ Significant Glare / Veiling│
│ Desk Footprint            │ 0 mm² (Mounts to Bezel)   │ 15,000–30,000 mm² Base    │
│ Lighting Distribution     │ Even Across Strike Zone   │ Concentrated Hot Spot     │
│ Blue-Light Attenuation    │ 2700K Warm Spectrum Mode  │ Variable / Often Fixed    │
│ Relative Cost Range       │ $40 to $180               │ $20 to $90                │
└───────────────────────────┴───────────────────────────┴───────────────────────────┘
- Specular glare control: High-end light bars shield the light beam so it grazes the front of your screen without bouncing reflections into your eyes.
- Color rendering and temperature: Keep surface task lighting around 500 lux. Use a Color Rendering Index (CRI) of Ra $\ge 95$ to ensure colors look accurate and reduce optical strain. Use cooler temperatures (4000K to 5000K) during morning deep-work blocks to stay alert, then shift down to warm white (2700K) late in the day to protect your natural melatonin production.
4. Power Topology, Docks, and Cable Management
Cable management is not just an aesthetic touch; it protects your electronic components, simplifies troubleshooting, and lets height-adjustable desks move freely without snagging wires.
              POWER TOPOLOGY & UMBILICAL PATHWAY

     [WALL OUTLET]
          │
          ▼
   [HEAVY-DUTY FLOOR UMBILICAL / VERTICAL SPINE]
          │ (Calculated 15–20 cm Slack Loop at Max Elevation)
          ▼
   ┌──────────────────────────────────────────────────────────────┐
   │ UNDER-DESK STEEL RACEWAY (Surge Protector, 15A Breaker)      │
   └──────┬───────────────────────┬───────────────────────┬───────┘
          │                       │                       │
          ▼                       ▼                       ▼
   [THUNDERBOLT DOCK]     [DESK LIFT MOTORS]      [LIGHTING SYSTEMS]
          │
          ▼
     Single Cable to Workstation (100W PD + Video + Peripherals)
Building an Under-Desk Power Hub
- Unified power distribution: Fasten an all-metal, 8-to-12 outlet surge suppressor directly to the underside of your desk frame or inside an under-desk wire tray. Every desktop peripheral plugs into this single distribution block.
- The umbilical loop: Run a single, heavy-duty electrical cord down from the under-desk tray to the wall outlet. Encase this main line in a flexible, jointed cable spine or an expandable braided sleeve.
- Calculating cable drop length: Before securing your cables, raise your adjustable desk to its absolute maximum height limit. Ensure your main power drop and all peripheral cords have at least 15 to 20 centimeters of free slack. Cords anchored without enough give can bend connectors, short internal wiring, or pull ports straight out of expensive hardware.
5. Organizational Substrates: Mats, Organizers, and Acoustic Isolation
A high-performance desk surface is deliberately structured, tactile, and quiet.
- High-density desk mats: A desk mat measuring 900 by 400 millimeters serves three functional purposes: it smooths mouse sensor tracking, absorbs the mechanical click noise of keyboard keystrokes, and marks the physical boundary of your Zone 1 Strike Zone. Natural wool felt offers excellent warmth and acoustic dampening, while smooth-grain vegetable-tanned leather or textured waterproof polymers (like desk mats made from natural linoleum) provide a durable, easily cleaned surface.
- Active acoustic dampening: Hard plaster walls and glass windows bounce high-frequency sounds around your workspace, creating a slight, subconscious echo that leads to fatigue on video calls. Mount acoustic PET-felt panels (rated at NRC 0.70 or higher) directly behind your monitors or on nearby walls to absorb chatter, deaden early room reflections, and sharpen your focus.
Master Comparison: Desk Architectures by Tier and Budget
| Component Layer | Budget Entry Tier ($150–$400) | Mid-Tier Performance ($700–$1,500) | Professional Reference ($2,500–$5,000+) |
| Desk Frame & Surface | Fixed 74 cm powder-coated steel frame; laminated particle-board. | Dual-motor electric 3-stage base; dense laminate or bamboo top. | Commercial 4-leg dual-motor base; solid walnut, oak, or custom hardwood slab. |
| Primary Seating | Basic mesh task chair with pneumatic cylinder and fixed 2D arms. | Dynamic synchro-tilt chair (e.g., Eurotech Vera, refurbished Steelcase). | Flagship ergonomic chair (e.g., Herman Miller Embody, Aeron, Steelcase Gesture). |
| Monitor Mount | Factory monitor tilt stand; fixed-height wood shelf riser. | Single heavy-duty gas-assist arm; clamp-to-desk mounting (VESA). | Dual mechanical counterbalance arm system with micro-adjustment alignment. |
| Docking / Hub | Multi-port USB-C travel dongle; passive passthrough charging. | Dedicated Thunderbolt 4 desktop dock; dual-monitor DisplayPort/HDMI outputs. | Enterprise Thunderbolt 4 workstation hub, integrated DAC, 2.5 GbE Ethernet. |
| Input Devices | Standard membrane keyboard; ambidextrous optical mouse. | Hot-swappable mechanical keyboard; ergonomic productivity mouse (e.g., MX Master 3S). | Custom split-ergonomic keyboard (ZSA Voyager, Glove80); vertical mouse or trackball. |
| Lighting Architecture | Clamp-on flexible LED gooseneck lamp; single color profile. | Balanced asymmetrical monitor light bar; touch-sensitive CCT adjustments. | BenQ WiT ScreenBar Halo with rear halo bias lighting, high-CRI task fill light. |
| Cable Management | Under-desk adhesive plastic clips; basic spiral cable wrap. | Under-desk steel wire basket; split-mesh braided sleeving. | Heavy-duty steel flip-down cable tray, modular tracks, articulating floor spine. |
How to Set Up Your Desk Step-by-Step
Setting up an ergonomic desk in the correct order saves time and prevents you from having to tear down hardware to fix cables later.
                        ASSEMBLY SEQUENCE

  ┌─────────────────────────────────────────────────────────────┐
  │ STEP 1: Calibrate Chair to Anthropometric Knee/Hip Angles   │
  └──────────────────────────────┬──────────────────────────────┘
                                 ▼
  ┌─────────────────────────────────────────────────────────────┐
  │ STEP 2: Level Desk Frame & Set Baseline Sitting/Standing    │
  └──────────────────────────────┬──────────────────────────────┘
                                 ▼
  ┌─────────────────────────────────────────────────────────────┐
  │ STEP 3: Anchor Under-Desk Power Strips & Universal Docking  │
  └──────────────────────────────┬──────────────────────────────┘
                                 ▼
  ┌─────────────────────────────────────────────────────────────┐
  │ STEP 4: Clamp Counterbalance Arm & Align Monitor Elevation  │
  └──────────────────────────────┬──────────────────────────────┘
                                 ▼
  ┌─────────────────────────────────────────────────────────────┐
  │ STEP 5: Center Input Peripherals & Calibrate Strike Zone    │
  └──────────────────────────────┬──────────────────────────────┘
                                 ▼
  ┌─────────────────────────────────────────────────────────────┐
  │ STEP 6: Route Umbilical Lines & Test Maximum Height Slack   │
  └─────────────────────────────────────────────────────────────┘
Step 1: Calibrate Your Seating First
Sit in your task chair with your hips pressed firmly against the rear lumbar curve. Adjust the seat height until your feet rest flat on the floor with your knees bent at an angle between 90 and 100 degrees. Your thighs should sit parallel to the floor, leaving a small, two-finger gap between the front edge of the seat cushion and the back of your knees to preserve healthy circulation.
Step 2: Level the Desk Surface
Roll your chair up to the desk with your shoulders relaxed and your elbows bent at a natural 90-degree typing angle. Adjust the desk height until the top of the desk matches the exact resting height of your forearms. Level the desk using the adjustable leveling glides beneath the feet; a frame that is out of level will bind lifting columns and introduce unwanted monitor wobble.
Step 3: Install Power Strips and Docking Hubs
Install your under-desk cable tray, power strip, and universal docking station before setting any heavy hardware on the desk. Mounting your power strip directly to the frame at this stage lets you route power and data cables cleanly as you add each peripheral, keeping wires hidden from the start.
Step 4: Mount Displays and Calibrate Optical Height
Clamp your articulating monitor arm to the rear edge of the desk frame, reinforcing the clamp with a steel mounting plate if your desktop has a hollow-core or particle-board center. Mount your monitor and raise it until your eyes look directly at the top third of the screen glass. Tilt the display back 10 to 15 degrees to match your eye’s natural downward gaze angle.
Step 5: Arrange Input Peripherals
Place your desk mat in the center of your primary working area. Position your keyboard and mouse inside your Zone 1 Strike Zone so your wrists stay flat and straight while typing, with no sharp bends upward, downward, or to the sides. Keep your mouse close enough to the keyboard that you don’t have to reach outward from the shoulder to move it.
Step 6: Route Cables and Test Height Clearance
Plug your peripherals into the power strip and docking station, bundling extra cord length inside the wire tray with hook-and-loop straps. Raise an electric standing desk to its absolute maximum height and verify that your main power umbilical drop doesn’t pull tight or strain your wall outlets.
5 Critical Desk Setup Mistakes and How to Avoid Them
1. The Slouched Screen Angle
- The failure: Resting a laptop flat on your desk forces your neck down into a severe forward bend, increasing compressive stress on the cervical vertebrae.
- The fix: Place the laptop on an elevated vertical riser or external laptop arm to lift the screen to eye level. Add an external keyboard and mouse so your hands remain at a neutral desk level.
2. Following the Outdated 50/50 Standing Rule
- The failure: Standing for half your workday (or several hours without a break) causes blood to pool in your lower legs, increases pressure on knee joints, and can lead to lower back muscle strain.
- The fix: Follow the Cornell University Ergonomics protocol: 20 minutes of supported sitting in a neutral posture, 8 minutes of standing, and 2 minutes of light walking or stretching.
3. Placing Soft Wrist Rests Under Your Hands While Typing
- The failure: Resting the soft underside of your wrists on a wrist pad while actively typing compresses the median nerve inside the carpal tunnel against the desk.
- The fix: Float your wrists above the desk while typing, using your shoulder muscles to guide your hands across the keys. Use palm rests only to rest the fleshy base of your palms during pauses between typing sessions.
4. Over-Tightening Cables Along Moving Frame Joints
- The failure: Fastening cables tightly along desk frame legs using plastic zip ties can pinch or sever wires when the desk moves up and down.
- The fix: Use flexible, reusable hook-and-loop straps instead of rigid zip ties. Leave an expanding 15 to 20 cm curve of slack at every moving hinge or height-adjustment joint.
5. Pointing High-CRI Task Lights Directly at Glass Displays
- The failure: Aiming standard reading lamps or direct desk lights at your monitor causes harsh reflections, washed-out text, and pupil strain.
- The fix: Use an asymmetrical monitor light bar that channels its light pool forward onto the desk surface, or place diffuse task lights to the side at a 45-degree angle to the screen.
Specialized Desk Configurations by Work Profile
                 SPECIALIZED HARDWARE PROFILES

  ┌─────────────────────────┐     ┌─────────────────────────┐
  │    SOFTWARE ENGINEER    │     │   CREATIVE / DESIGNER   │
  ├─────────────────────────┤     ├─────────────────────────┤
  │ Dual-Axis Vertical VESA │     │ 32" Calibrated 4K OLED  │
  │ Split Ortho Keyboard    │     │ Solid Hardwood Surface  │
  │ High-Bandwidth TB4 Dock │     │ Studio Monitor Isolators│
  │ 32GB/64GB RAM Terminal  │     │ Color-Neutral Light Bar │
  └─────────────────────────┘     └─────────────────────────┘
The Software Engineer and Systems Coder
- Display arrangement: A dual-monitor setup with one primary horizontal display and a secondary 24-to-27-inch vertical display mounted at a 90-degree portrait orientation. This vertical orientation lets you read long files of source code or terminal output without constant scrolling.
- Input system: A split ortholinear mechanical keyboard running open-source firmware (QMK/ZMK), paired with a vertical trackball to cut down on wrist travel across multiple displays.
- Data backbone: An enterprise-grade Thunderbolt 4 docking station that supplies 100W of power delivery while running two 4K screens at a smooth 144Hz refresh rate over a single cable.
The Creative Professional and Digital Designer
- Display arrangement: A color-accurate 32-inch 4K or 5K display offering 99% coverage of the DCI-P3 and Adobe RGB color spaces, equipped with an anti-reflective magnetic hood to shield against room light.
- Surface profile: A deep, 80-to-90-centimeter solid hardwood desktop (such as hard maple or European oak) that provides ample physical room for drawing tablets, print proofs, and physical color swatches.
- Audio isolation: Desktop audio monitor isolation pads or clamp-on speaker stands that elevate reference speakers to ear level, keeping vibrations from rattling your desk surface.
The Knowledge Worker and Long-Form Writer
- Input system: A quiet, tactile mechanical keyboard built with lubed switches and sound-dampening foam to reduce finger strain and minimize typing noise on calls.
- Environmental setup: A large 900×400 mm wool-felt desk mat paired with a low-noise desktop HEPA air filter to keep the workspace clean and quiet.
- Visual comfort: A high-CRI light bar paired with a soft, warm background bias light behind the screen to prevent eye strain during long writing sessions.
Frequently Asked Questions
What are the most essential items for a desk setup?
The most essential items are an adjustable task chair with proper lumbar support, an appropriately sized desk, an external monitor positioned at eye level, an external keyboard, an ergonomic mouse, and focused task lighting. These six tools establish a neutral posture and protect against muscle strain.
How do you arrange items on a desk for optimal efficiency?
Group your desktop tools into three distinct functional zones. Keep your high-frequency tools (keyboard, mouse, and notebook) in the Zone 1 Strike Zone within 40 cm of your body. Place secondary items (monitors, lights, water bottle) in Zone 2 within an arm’s reach. Move reference items and backup gear into Zone 3 along the desk’s perimeter.
Are monitor light bars better than regular desk lamps?
Yes, monitor light bars outperform traditional desk lamps for computer work. They feature an asymmetrical optical design that casts light across your desk space without washing out your screen or reflecting light back into your eyes, all without taking up any space on your desktop.
How much should you spend on a proper desk setup?
A reliable, ergonomic home workspace costs between $700 and $1,500. This budget secures an adjustable dual-motor standing desk, a certified ergonomic task chair, a gas-spring monitor arm, and a solid external keyboard and mouse.
Is an anti-fatigue mat necessary for a standing desk?
Yes, using an anti-fatigue mat is essential if you stand for more than 15 minutes at a time. The high-density foam cushion encourages small, subconscious muscle contractions in your calves and feet, which keeps venous blood circulating and eases pressure on your knees and lower back.
The Bottom Line
A high-performance workspace balances ergonomic alignment, reliable computing hardware, and clean physical space. By investing in the right foundational tools—a supportive task chair, a sturdy height-adjustable desk, an elevated screen, and zoned peripherals—you protect your long-term physical health and build an environment focused on clear, productive work. Build out your setup step-by-step, maintain clean reach zones, and let your daily workflow shape your desk.