Learning how to clean a desk properly restores workspace hygiene, protects expensive electronics, and sharpens cognitive focus through a 12-step top-to-bottom sequence: decoupling hardware, stripping the surface, purging clutter, high-zone dusting, dry extraction, surfactant wiping, dry buffing, peripheral disinfection, screen polishing, base cleaning, cable routing, and ergonomic zoning. This beginner-friendly process takes 20 to 30 minutes, and success depends on strict dry-before-wet separation to prevent turning loose dust into abrasive mud.
Before You Start: Prerequisites & Materials
- Time Required: 5–7 minutes (weekly maintenance) | 20–30 minutes (monthly deep clean)
- Difficulty Level: Beginner
- Typical Cost: $10–$15 (Minimalist setup) | $30–$60 (Advanced tech setup)
- Prerequisite Conditions: Save all open computer files, allow hot monitor power bricks to cool for 5 minutes after shutdown, and clear a 1.5-meter staging area on a nearby bed or table to hold removed hardware.
| Category | Required Item | Exact Specification / Quantity | Purpose |
| Cloths | Color-Coded Microfiber Cloths | 4 cloths (300 GSM edgeless terry weave: Blue, Green, Yellow; 1 silk/waffle weave: Gray) | Prevents cross-contamination between desk, plastics, and screens |
| Air / Extraction | Vacuum + Electric Air Duster | Vacuum with soft horsehair brush attachment; 50,000+ RPM electric duster | Removes dry crumbs and switch debris without canned air propellant |
| Surfactants | Material-Specific Cleaner | 500 ml warm water + 2 ml mild dish soap (or Murphy’s Oil Soap / 1:1 vinegar mix) | Lifts lipophilic skin oils and sweat via surfactant micelle action |
| Disinfectant | Isopropyl Alcohol (IPA) | 70% concentration (pre-moistened wipes or 250 ml spray bottle) | Denatures pathogen proteins on high-touch plastic peripherals |
| Screen Care | Distilled Water | 100 ml in a fine-mist atomizer bottle | Cleans anti-glare monitor coatings without chemical delamination |
| Detail Tools | Plastic Scraper & Swabs | 1 old plastic credit card; 10 cotton swabs; 1 melamine foam sponge (Magic Eraser) | Removes cured adhesives, ink bleed, and keycap crevice grime |
| Organization | Cable Management Kit | 10 hook-and-loop ties, 1 under-desk J-channel or tray, 1 roll painter’s tape | Suspends power bricks and labels unplugged cords |
The Science & Material Matrix
Effective workspace sanitization relies on three distinct scientific phases: De-cluttering (Physical Separation) to expose hidden surface geometry; Cleaning (Surfactant Action) where amphiphilic molecules bind fat-attracting lipophilic tails to skin sebum and water-attracting hydrophilic heads to water so grime lifts cleanly; and Disinfecting (Microbial Destruction) where 70% isopropyl alcohol or EPA-registered disinfectants penetrate microbial cell walls to denature proteins. Because an unmaintained desk hosts up to 400 times more bacteria per square inch than a porcelain toilet seat, executing all three phases in order is mandatory.
Before applying any liquid in Phase 3, match your desk substrate to the chemical constraints below:
| Desk Material | Primary Cleaning Agent | Forbidden Substances | Best Tools | Special Care Steps |
| Wood (Solid / Veneer) | Dedicated wood soap (Murphy’s) or 2 ml dish soap in 500 ml warm water | Isopropyl alcohol, bleach, ammonia, standing water, abrasive pads | Ultra-soft 300 GSM microfiber cloths | Wipe strictly parallel to the wood grain; apply carnauba wax or mineral oil every 6–12 months. |
| Laminate / MDF | All-purpose surface cleaner, mild dish soap mix, or 70% isopropyl alcohol | Steel wool, scouring powders, excessive pooling liquid near seams | Microfiber cloths, non-scratch sponges | Keep moisture 2 cm away from edge banding and cable grommets to prevent particleboard core swelling. |
| Glass (Tempered) | Ammonia/alcohol glass cleaner or 1:1 distilled white vinegar and water | Abrasive powders, wood-pulp paper towels, unpadded metal objects | 250 GSM waffle-weave glass cloth, mini squeegee | Buff in tight circular motions to erase halo streaks; always use a felt pad under metal gear. |
| Metal (Steel / Coated) | Diluted dish soap (2 ml per 500 ml water) or mild multi-surface spray | Bleach, acidic vinegar solutions, coarse scouring pads | Standard terry microfiber cloths | Buff bone-dry immediately after wiping to prevent water spots, oxidation, and powder-coat stripping. |
Phase 1: Preparation, Decoupling & Triage (5–10 Minutes)
Step 1: Power Down and Label All Electronics
Shut down your computer completely, switch off the rear power supply unit (PSU) rocker switch, and unplug the main surge protector from the wall outlet before detaching any device cables.
Wrap a 2 cm strip of painter’s tape around the end of each USB, HDMI, DisplayPort, and power cord, marking its exact port location (e.g., “Left Monitor DP,” “DAC USB 3.0”) with a permanent marker, or snap a well-lit smartphone photo of your rear I/O panel. Unplug every peripheral cable and coil them loosely with their respective devices. Warning: Never unplug or wipe power strips while energized; liquid ingress or metallic cable tips bridging live outlet slots can cause immediate electrical shorting or arc faults.
- Success Checkpoint: You’ll know it worked when the main wall outlet is completely empty, no LED standby lights are glowing on any monitor or motherboard, and every disconnected cable has a readable label or photo reference.
- Common Mistake: Pulling DisplayPort or Ethernet cables out by force without depressing their plastic locking latches, which shears the internal port pins right off the graphics card or motherboard. Always squeeze the connector housing thumb-tab firmly before pulling straight back.
Step 2: Strip the Desk Surface Completely
Remove every single object from the desktop—including monitors, monitor stands, keyboards, mice, speakers, pen cups, coffee mugs, and desk mats—and place them safely in your staging area.
Do not attempt to clean around heavy monitor bases or organizers; leaving static objects in place creates dust halos and traps moisture underneath rubberized feet. If you use a neoprene or felt desk mat, take it straight to a sink or bathtub, scrub it gently with cold water and 5 ml of mild liquid detergent using a soft brush, rinse thoroughly, roll it in a dry bath towel to press out excess water, and lay it flat to air-dry while you complete the rest of the process.
- Success Checkpoint: You’ll know it worked when the entire horizontal work surface is 100% bare from edge to edge, exposing only the raw wood, laminate, glass, or metal substrate and empty cable grommet holes.
- Common Mistake: Throwing a rubber-backed desk mat into a heated clothes dryer or washing machine on a hot cycle, which melts the non-slip rubber underside and permanently curls the stitched edges. Always hand-wash cold and air-dry flat.
Step 3: Triage Clutter into Three Action Piles
Sort all non-essential loose items removed from the desk into three strict physical zones: Keep on Desk, File/Store Elsewhere, and Trash/Recycle.
Discard empty food wrappers, dried-out pens, and obsolete sticky notes immediately into a trash bag, and carry dishes straight to the kitchen sink. Limit your Keep on Desk pile to items you touch at least once every 24 hours (monitor, input devices, active notebook, one primary pen, water vessel). Move reference books, spare thumb drives, tax documents, and extra charging bricks into closed drawers or filing cabinets.
- Success Checkpoint: You’ll know it worked when your “Keep on Desk” staging pile contains fewer than 8 total non-computing items and all paper stacks are eliminated from the primary work zone.
- Common Mistake: Creating a fourth “Decide Later” pile, which inevitably migrates right back onto the clean desk corner as visual clutter. Force a binary keep-or-store decision on every item within 10 seconds.
Phase 2: Dry Particulate Extraction (2–5 Minutes)
Step 4: Dust Overhead Zones and Monitor Housings
Wipe down overhead shelving, desk lamp arms, microphone boom arms, and the top vents of your monitors using a dry electrostatic duster or a dry yellow 300 GSM microfiber cloth, working strictly from the highest elevation downward.
Gravity pulls dislodged dust particles toward the floor; dusting overhead fixtures after cleaning the desktop forces you to clean the main surface twice. Use long, unidirectional strokes along the top bezel of your monitors and across articulated monitor arms, folding the microfiber cloth into quarters so you can rotate to a clean face as soon as one side turns gray.
- Success Checkpoint: You’ll know it worked when running a clean fingertip across the top rear exhaust vents of your monitor and the upper surface of your monitor arm leaves zero gray dust transfer on your skin.
- Common Mistake: Feather-dusting back and forth rapidly, which launches fine allergens into the air only for them to settle back onto the desk 10 minutes later. Wipe slowly in one direction with slight downward pressure so electrostatic fibers trap the particles.
Step 5: Vacuum the Bare Surface and Blow Out Peripherals
Vacuum the bare desktop, cable grommet cutouts, and under-desk trays using a vacuum cleaner fitted with a soft horsehair brush attachment, then take your keyboard and mouse to a trash can to blow out internal debris with an electric air duster.
Never use a bare plastic vacuum nozzle on wood or glossy laminate, as grit caught on hard plastic carves micro-scratches into the finish. When blowing out a mechanical or membrane keyboard, invert the board over a bin, hold the electric duster nozzle at a 45-degree angle 15 cm (6 inches) away from the keycaps, and sweep across the rows in short 3-second bursts.
- Success Checkpoint: You’ll know it worked when the bare desktop feels completely smooth to the palm with zero gritty crumbs, and peering between your keyboard’s keycap rows reveals clean switch housings free of hair or food particulates.
- Common Mistake: Holding a high-velocity duster or canned air nozzle closer than 5 cm perpendicular to mechanical keyboard switches, which drives fine dust past the stem seal onto the internal metal leaf contacts and causes key chattering. Keep the nozzle angled and at least 15 cm back.
Phase 3: Wet Surfactant Cleaning & Sanitization (5–10 Minutes)
Step 6: Execute the Overlapping Surfactant Grid Wipe
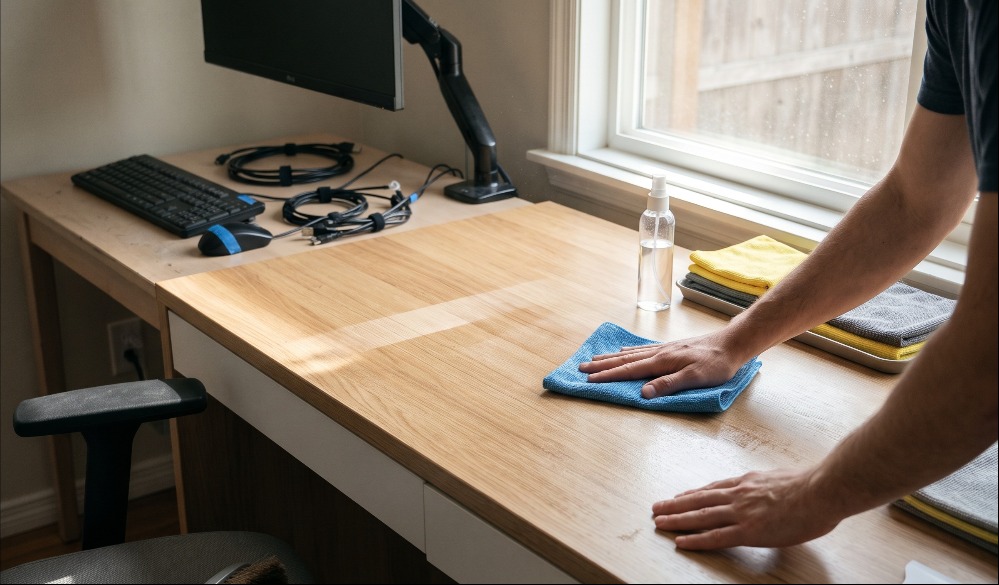
Mist 3 to 4 sprays of your material-appropriate cleaning solution directly onto a clean blue 300 GSM microfiber cloth until damp (never dripping), and wipe the bare desktop in an overlapping left-to-right, top-to-bottom grid pattern.
Warning: Never spray aerosol or liquid cleaners directly onto the desk surface, near grommet seams, or around standing desk control panels, as liquid seepage causes MDF swelling and electrical shorts. Apply approximately 1 to 1.5 kg (2–3 lbs) of downward palm pressure—about the force required to press a bathroom scale slightly. Overlap each horizontal pass by 50%, then repeat vertically. Finish by scrubbing the front bullnose edge where your forearms rest and 5 cm underneath the front lip where your fingers grip the desk, as these zones harbor 80% of accumulated skin lipids and sweat.
- Success Checkpoint: You’ll know it worked when the entire surface displays an even, ultra-thin sheen of moisture that evaporates within 15 seconds without beading over greasy patches, and the front edge feels squeaky rather than slick.
- Common Mistake: Using too much dish soap in a DIY mix (more than 2 ml per 500 ml water), which leaves behind a microscopic sticky surfactant layer that acts like flypaper for airborne dust. Stick strictly to 2 ml (half a teaspoon) per 500 ml bottle.
Step 7: Dry Buff the Surface and Condition the Substrate
Buff the entire desktop immediately using a bone-dry, folded microfiber cloth to lift remaining moisture and surfactant micelles before they air-dry into streaks.
For solid wood or veneer, buff strictly parallel to the wood grain; if performing a 6-month seasonal maintenance clean, apply a dime-sized drop of food-grade mineral oil or carnauba furniture wax onto a soft cloth, rub it into the grain, wait 10 minutes, and buff clear. For tempered glass, use a dry 250 GSM waffle-weave cloth in tight circular motions until all rainbow halo streaks vanish. For powder-coated metal, dry every weld seam immediately to prevent oxidation.
- Success Checkpoint: You’ll know it worked when viewing the desktop at a low 30-degree angle against a room light or window reveals uniform reflection with zero cloudy smears, water spots, or lint fibers.
- Common Mistake: Buffing glass or high-gloss piano-black laminate with standard wood-pulp paper towels, which shed heavy white lint and contain cellulose fibers rigid enough to carve permanent swirl marks into soft coatings.
Step 8: Disinfect High-Touch Peripherals with 70% Isopropyl Alcohol
Wipe down your mouse shell, mouse scroll wheel, keyboard keycaps, keyboard frame, telephone receiver, and standing desk height controller using a green microfiber cloth dampened with 70% isopropyl alcohol (or pre-moistened 70% IPA wipes), keeping the plastic visibly wet for a minimum contact time of 30 to 60 seconds.
Why 70% IPA instead of 91% or 99%? Pure alcohol evaporates in under 5 seconds and coagulates surface proteins instantly, creating a protective shell around bacteria instead of penetrating the cell wall; the 30% water content in 70% IPA acts as a catalyst to breach the membrane and denature internal proteins completely. Wrap the wipe over a cotton swab to run along the narrow grooves between keycaps and around mouse side buttons.
- Success Checkpoint: You’ll know it worked when the shiny, greasy film on your spacebar, WASD keys, and mouse left-click button disappears, restoring a uniform matte texture after the alcohol air-dries.
- Common Mistake: Wiping the wet alcohol off immediately with a dry towel, which reduces pathogen kill rates below 20%. Always let the 70% IPA air-dry naturally over its full 30-to-120-second label contact window, and avoid getting alcohol onto ABS keycaps painted with cheap UV-cured legends or rubberized mouse grips that can turn tacky.
Step 9: Polish Monitor Screens with Distilled Water
Mist a gray silk-weave or tight-weave microfiber cloth once with pure distilled water—never alcohol, window cleaner, or tap water—and wipe your monitor screen from top to bottom using feather-light pressure (under 100 grams of force).
Modern LCD, IPS, and QD-OLED panels feature microscopic anti-glare or polarizing chemical coatings that delaminate and turn permanently cloudy when exposed to ammonia, acetone, or isopropyl alcohol. Tap water contains dissolved calcium and magnesium minerals that dry into abrasive white spots. If a sneeze droplet or fingerprint resists plain distilled water, hold the barely damp section of the cloth against the spot for 10 seconds to soften it rather than scrubbing harder.
- Success Checkpoint: You’ll know it worked when the unplugged black screen reflects your room smoothly like a dark mirror with zero smudge trails, rainbow oil slicks, or white edge residue.
- Common Mistake: Pressing your index finger behind the cloth to scrub a stubborn spot on the panel, which crushes the liquid crystal layer or fractures internal OLED sub-pixels. Support the back of the monitor bezel with one hand and wipe only with a flat, open palm holding a folded cloth.
Phase 4: Component Reset & Cable Optimization (10–15 Minutes)
Step 10: Sanitize Component Bases and Under-Surfaces
Flip over every item in your “Keep on Desk” pile—monitor stands, keyboard underside feet, mouse PTFE skates, wrist rests, and pen cups—and wipe their contact pads with a damp soapy cloth followed by a dry towel before setting them back on the clean desk.
Skipping the underside of your gear transfers old grit, spilled coffee rings, and sticky residue right back onto your freshly sanitized desktop the second you set them down. Check the rubber flip-out feet on your keyboard and the bottom ring of your ceramic mug warmer; scrape away any compacted dust bunnies fused to the rubber pads using the edge of your plastic credit card.
- Success Checkpoint: You’ll know it worked when the rubber grip pads on the bottom of your keyboard and mouse feel tacky and clean to the touch, gripping the desk firmly without sliding.
- Common Mistake: Using a sharp metal blade or fingernail to gouge grit off the white PTFE (Teflon) glide skates on the bottom of your mouse, which creates burrs that scratch your desk mat and ruin sensor tracking. Wipe mouse skates gently with a flat microfiber cloth only.
Step 11: Route and Suspend Cables Off the Floor
Mount your surge protector into an under-desk cable management tray, route display and peripheral cords through under-desk J-channels, and bundle slack every 25 cm using reusable hook-and-loop straps.
Leave 15 to 20 cm of slack near the monitor arm pivot points and a 40 cm “service loop” if you operate a motorized sit-stand desk so cables never pull taut at maximum standing height (typically 115–125 cm). Keep high-voltage AC power cords separated by at least 5 cm from unshielded audio cables to prevent 60Hz electromagnetic hum, and ensure zero cables or power bricks rest on the floor where they trap dust bunnies and block vacuuming.
- Success Checkpoint: You’ll know it worked when sitting in your chair at normal eye level reveals zero dangling wires beneath the rear edge of the desk and the floor beneath your feet is 100% clear of cords.
- Common Mistake: Cinching nylon zip-ties tightly around copper HDMI or power cables, which crushes internal wire shielding and forces you to use sharp scissors near delicate insulation during your next teardown. Always use soft hook-and-loop (Velcro) straps tightened just enough to hold the bundle together.
Step 12: Re-enter Gear Using the Ergonomic Reach Zone Strategy
Place your cleaned hardware back onto the desk according to biomechanical reach arcs, then reconnect all labeled cables to their matching ports before plugging the main surge protector back into the wall.
Organize the surface into three concentric radii measured from your seated torso:
- Primary Zone (20–35 cm / Forearm Sweep): Keyboard and mouse centered directly in front of your shoulders, with the front edge of the keyboard sitting 8 to 10 cm back from the desk’s front bevel so your wrists rest smoothly on your clean, dry desk mat.
- Secondary Zone (35–60 cm / Full Arm Extension): Monitor positioned directly at an arm’s length away (50–70 cm from your eyes) with the top bezel at or 2 cm below eye level, flanked by your notepad, pen cup, or audio interface.
- Tertiary Zone (60+ cm / Torso Lean Required): Reference items, decorative plants, speakers, or ambient lighting pushed to the far corners.
- Success Checkpoint: You’ll know it worked when you can type, click, drink water, and jot a note without lifting your elbows away from your ribcage, and powering on the PC boots all displays and USB devices on the first try.
- Common Mistake: Placing your water glass or coffee mug in the Primary or Secondary zone directly uphill from your mechanical keyboard, where an accidental elbow bump sends liquid straight into the switches. Always park liquids on a coaster at the far outer edge of your non-mouse hand.
Common Mistakes and How to Fix Them (Troubleshooting)
Even when following a careful routine, workspace surfaces suffer from cured adhesives, chemical hazing, and mechanical wear. Use these recovery protocols to fix common failures:
1. Persistent Sticky Residue (Tape, Stickers, or Dried Soda)
- Why It Happens: Acrylic adhesives and caramelized sugars cross-link with the surface texture, resisting standard soap micelles.
- How to Fix It: Place 2 drops of mineral oil, Goo Gone, or 70% isopropyl alcohol (strictly on laminate or glass—never use alcohol on wood) directly onto the sticky spot. Let it dwell for exactly 60 seconds to dissolve the adhesive bond. Hold an old plastic credit card at a 30-degree angle and scrape gently in one direction until the gummy layer balls up. Wipe the area immediately with a warm soapy microfiber cloth (2 ml dish soap per 500 ml water) to remove the oily solvent, then buff dry.
2. Intense Cloudy Streaking on Tempered Glass Desks
- Why It Happens: Residual dish soap film builds up over weeks, or fabric softener from laundry dryer sheets coats your microfiber cloths and smears hydrophobic wax across the glass.
- How to Fix It: Strip the glass by mixing a 1:1 ratio of distilled white vinegar and distilled water (100 ml each) in a spray bottle. Mist a clean, uncontaminated 250 GSM waffle-weave cloth (washed without fabric softener) and scrub the glass firmly. Immediately follow with a second bone-dry waffle-weave cloth, buffing in fast, tight circles until the acetic acid flashes off completely.
3. White Moisture Rings or Alcohol Blush on Wood Finishes
- Why It Happens: Setting a hot mug down or accidentally dripping isopropyl alcohol/sanitizer onto shellac or lacquer traps moisture inside the microscopic pores of the topcoat, turning it milky white.
- How to Fix It: For moisture rings, lay a dry, plain white cotton T-shirt over the blemish and press a household clothes iron set to Low/No Steam over the cloth for 5-second intervals, checking after each pass as the heat draws out trapped moisture. For minor alcohol blush on oil-rubbed wood, rub a pea-sized dab of non-gel white toothpaste mixed with a drop of mineral oil gently along the grain with a soft cloth, wipe clean, and reseal with paste wax.
4. Permanent Marker Bleed or Pen Ink Stains on White Laminate
- Why It Happens: Solvent-based permanent inks penetrate the microscopic pores of textured melamine and laminate wear layers within 30 seconds of contact.
- How to Fix It: Dab a cotton swab soaked in 70% isopropyl alcohol directly onto the ink line (do not rub in wide circles, which spreads the dissolved pigment into a pale halo). Blot upward with a dry microfiber towel until ink transfer stops. If a faint ghost stain remains on matte laminate, wet a melamine foam sponge (Magic Eraser), squeeze out excess water, and stroke the exact mark lightly 3 to 4 times—do not scrub hard, or the abrasive melamine micro-fibers will burnish a permanent shiny spot into the matte finish.
5. Swollen or Peeling Laminate Seams Near Cable Grommets
- Why It Happens: Overspraying cleaner directly onto the desk allows water to wick into unsealed MDF or particleboard edges, causing wood fibers to expand like a sponge.
- How to Fix It: Once particleboard swells, it cannot be shrunk simply by drying. For minor edge lifting, inject a toothpick tip coated in waterproof PVA wood glue (such as Titebond II) under the loose laminate lip, place a flat block of scrap wood over the seam, and clamp it tightly with a C-clamp for 12 hours. Seal the exposed seam afterward with a thin bead of clear silicone caulk to block future moisture ingress.
6. Squeaking or Stuttering Motorized Standing Desk Legs
- Why It Happens: Overzealous cleaning with dish soap or alcohol along the telescoping metal leg columns strips away the factory white lithium grease required for smooth actuator gliding.
- How to Fix It: Never use degreasers or alcohol on inner telescoping leg stages. To restore smooth motion, raise the desk to its maximum height (125 cm), wipe away dry dust with a plain dry cloth, apply a thin, 2 cm vertical dab of PTFE-based dry lubricant or white lithium grease onto the four sliding wear pads of the inner column, and cycle the desk all the way down and up 3 times to distribute the lubricant.
Variations for Specific Workspace Profiles
Not every workspace operates under the same constraints. Adapt the core 12-step process to your specific environment and hardware profile:
1. The Digital Specialist & Remote Gaming Setup
- Primary Challenge: Heavy electrostatic dust accumulation inside high-airflow PC cases, multi-monitor arrays, and custom lubricated mechanical keyboards.
- Process Adjustments:
- Enforce a strict color-coded cloth protocol: Blue for the main desk surface, Green for non-screen plastic housings, and a sealed Gray silk-weave cloth strictly for OLED/IPS monitors.
- During Step 5, remove mechanical keycaps once every 90 days using a wire keycap puller (never a plastic ring puller, which scratches keycap sides), soak PBT/ABS keycaps in warm water with a denture cleaning tablet for 20 minutes, rinse, and air-dry completely on a towel for 6 hours before snapping them back onto the stems.
- Install an oversized 900x400mm washable felt or stitched-edge cloth desk mat to intercept 90% of forearm skin oils before they contact the raw desk surface.
2. The Creative & Multi-Media Studio Desk
- Primary Challenge: Graphite smudges, acrylic paint drips, spray adhesive overspray, cutting mat grooves, and dozens of loose analog tools (styluses, blades, markers).
- Process Adjustments:
- Keep a dedicated “rapid-response caddy” containing 70% isopropyl alcohol, mineral spirits, and a melamine sponge within arm’s reach to neutralize pigment and glue spills within 15 seconds before polymers cross-link and cure.
- Lay a self-healing PVC rotary cutting mat over the primary work zone during active studio work; clean the cutting mat separately during Step 2 using lukewarm water and a soft mushroom brush (never use alcohol or acetone on self-healing mats, as solvents dissolve the plasticizers that allow cuts to close).
- Replace flat desktop pen cups with modular vertical pegboards or tiered drawer trays so 100% of crafting tools lift off the desk in two movements during Step 2.
3. The Shared-Space Worker (Hot-Desking & Hybrid Office)
- Primary Challenge: High microbial exposure from rotating users, zero control over previous occupants’ hygiene, and a strict 2-minute setup/pack-down time ceiling.
- Process Adjustments:
- Skip the full cable teardown and replace it with a Shift-Boundary Sanitization Protocol executed at the exact start and finish of every shift.
- Carry a mobile tech pouch containing a pocket canister of EPA-registered sanitizing wipes (or 70% IPA wipes) and a miniature 30 ml screen mist bottle.
- Before setting your laptop down, pull two sanitizing wipes: use the first to wipe the desk surface and chair armrests (the most neglected germ vector in shared offices), and the second to wipe the shared docking station cable, monitor power button, and desk height paddle. Wait 60 seconds for air-drying before unpacking your gear.
Operational Metrics: Timelines, Frequencies & Costs
Maintaining a pristine workspace requires balancing daily micro-habits against periodic deep teardowns.
Maintenance Frequency Benchmarks
- Daily Reset (1 Minute — End of Workday): Clear away coffee mugs, dishes, and snack wrappers; push chair in; run a single 70% IPA wipe over your mouse and primary keyboard keys.
- Weekly Surface Maintenance (5–7 Minutes — Friday Afternoon): Leave monitors and cables plugged in; lift keyboard and mouse onto the monitor stand; vacuum loose crumbs around components; mist a microfiber cloth with all-purpose spray and wipe all exposed desktop zones.
- Monthly Deep Clean (20–30 Minutes — First Weekend of the Month): Execute the complete 12-step guide above, including full power-down, hardware removal, mat washing, underside base scrubbing, and cable re-tensioning.
Chemical Approach Comparison: Pre-Moistened Wipes vs. Microfiber + Spray
| Metric | Option A: Chemical Wipes (Pre-Moistened) | Option B: Microfiber Cloths + Spray Cleanser |
| Speed & Convenience | Exceptionally fast; zero mixing or laundry required; ideal for daily 1-minute touch-ups and hot-desking. | Requires 30 seconds of prep and periodic machine washing (cold water, no fabric softener). |
| Mechanical Cleaning Power | Low; thin spunlace nonwoven fibers slide over dried food bumps and leave sticky surfactant films if overused. | Superior; split wedge-shaped polyamide/polyester fibers physically scoop and trap microscopic grease and bacteria. |
| Long-Term Cost & Waste | High ongoing cost ($0.08–$0.15 per wipe); generates non-recyclable plastic canister and synthetic fiber trash. | Highly economical ($0.02 per clean); quality 300 GSM cloths survive up to 500 wash cycles before fiber degradation. |
| Risk Profile | Safe from overspray, but pooled liquid at the bottom of the canister can drip into keyboard switches if not wrung out. | Zero residue when dry-buffed in Step 7, provided liquid is sprayed onto the cloth away from the desk. |
Frequently Asked Questions
How often should I deep clean my desk and computer peripherals?
Perform a complete teardown deep clean once a month (every 30 days), which takes 20 to 30 minutes. Between deep cleans, spend 1 minute daily wiping your mouse and keyboard with a 70% isopropyl alcohol wipe and clearing mugs, plus 5 minutes weekly wiping exposed desk surfaces around your hardware.
Can I use Clorox or Lysol disinfecting wipes on a wood or laminate desk?
Use Clorox or Lysol wipes safely on non-porous laminate and sealed metal desks, followed by a damp water wipe to remove sticky chemical residue. Never use disinfecting wipes on solid wood, wood veneer, or oil-finished butcher block, as quaternary ammonium compounds and solvents strip protective lacquers and cause permanent clouding.
What is the safest way to clean a desk mat or XXL mousepad without ruining it?
Submerge the desk mat in a bathtub or sink filled with cold water and 5 ml (1 teaspoon) of mild liquid dish soap or gentle laundry detergent. Scrub sweat stains lightly with a soft nylon brush, rinse until all suds vanish, press excess water out inside a rolled towel, and air-dry flat for 12–24 hours.
Why does my desk get dusty again the day after I clean it?
Rapid re-dusting happens for three reasons: wiping with dry paper towels builds static electricity that attracts airborne lint; leaving too much soap residue creates a tacky film; or nearby PC intake fans pull room dust across the desk. Fix this by dry-buffing with a clean microfiber cloth and elevating your PC tower off the carpet.
How do I clean a desk without unplugging my dual-monitor setup?
For a 5-minute weekly clean, keep monitors plugged into their arms, power down the PC, and move only your keyboard, mouse, and desk mat off the surface. Vacuum around the monitor base, wipe the exposed desktop with a damp microfiber cloth using the grid method, and buff dry before setting your input devices back down.
Executing this 12-step routine transforms how to clean a desk from a haphazard chore into a repeatable 25-minute system that protects your finishes, extends peripheral lifespans, and keeps your primary work zone spotless.