Knowing exactly how to adjust an office chair aligns its moving parts to your unique biomechanics, preventing muscular strain and joint pain. By configuring seat height, depth, lumbar position, armrests, and tilt tension in the correct sequence, you establish a healthy baseline in under five minutes. The defining factor for success is adjusting from the ground up.
Before You Start
- Time Required: 5–10 minutes
- Difficulty: Beginner
- Cost: $0
- Tools & Equipment: Your office chair, your primary workstation/desk, and a dedicated footrest (only if your desk is not height-adjustable).
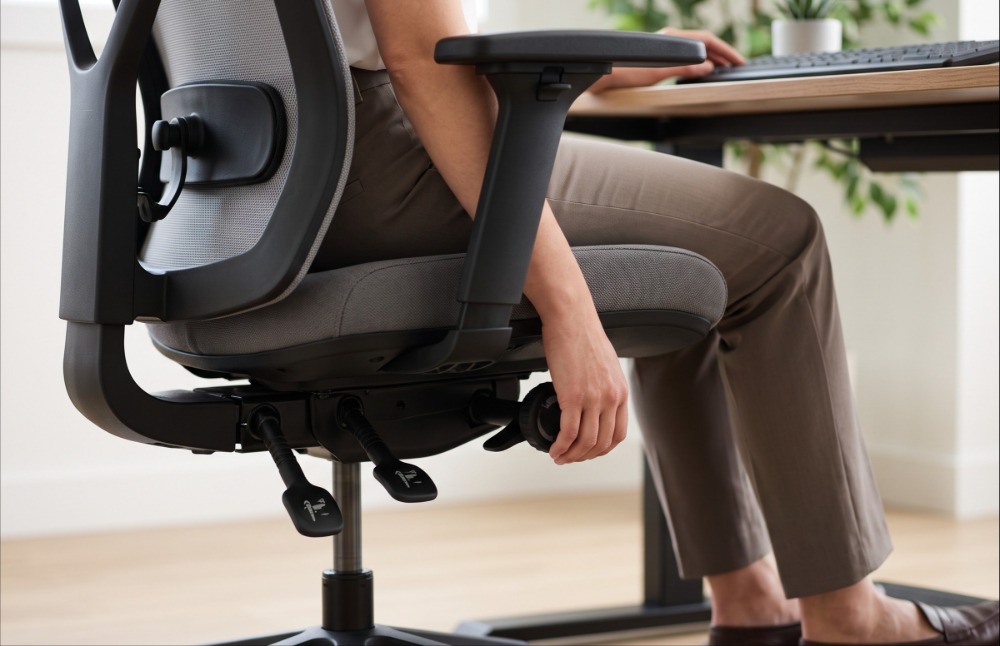
- Prerequisites: Familiarize yourself with your chair’s mechanism. Look under the seat pan to identify lever locations. Height is almost universally a paddle on the right side; tilt locks are usually on the left; tension knobs are typically large dials front-and-center under the seat.
Step 1: Set Seat Height for Lower Body Alignment
Actuate the pneumatic cylinder lever to raise or lower the seat until the highest point of the cushion sits parallel to the bottom of your kneecaps.
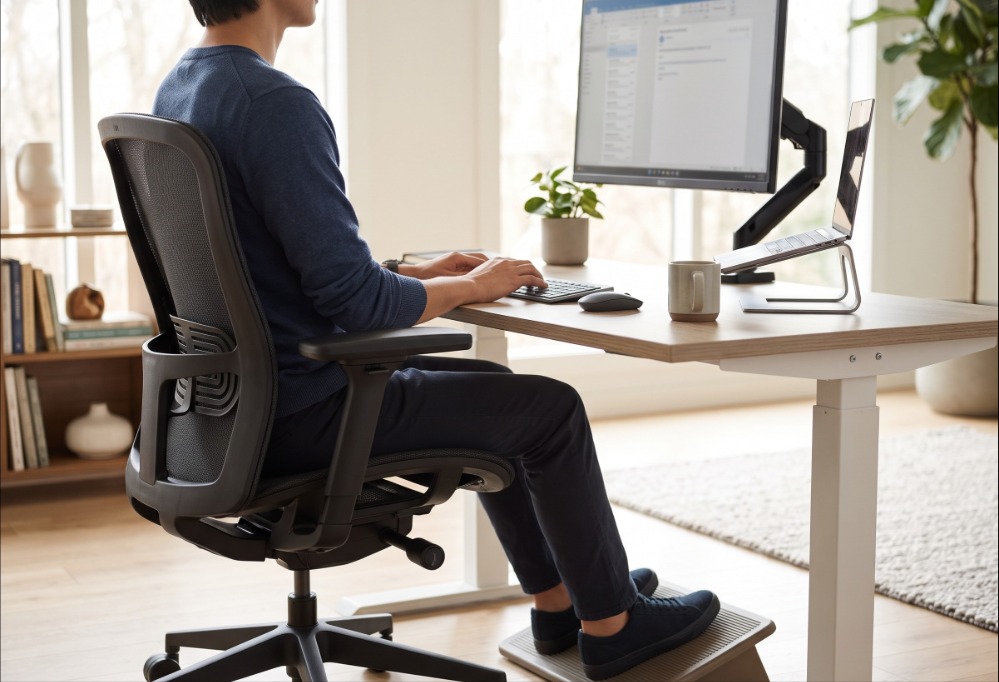
Stand facing your chair to gauge the initial height. Once the seat aligns just below your knees, sit down. Slide back until your lower back touches the backrest. Keep your feet flat on the floor. Your knees must bend at a 90-degree to 110-degree angle, with your hips strictly leveled with or slightly higher than your knees.
- Success Checkpoint: You can easily slide your flat hand between the front edge of the seat cushion and your lower thighs.
- Common Mistake: Dangling feet or tucking them behind the chair base. If your desk is a fixed height (typically 29 inches) and adjusting the chair to your desk lifts your feet off the floor, do not lower the chair. Instead, maintain the higher seat position and introduce an ergonomic footrest to close the gap.
Step 2: Adjust Seat Depth to Protect Circulation
Release the seat slider lever—usually a paddle or button on the side of the seat pan—and shift your weight forward or backward to move the seat.
You must support the maximum surface area of your hamstrings without pressing foam into the back of your knees (the popliteal fossa). Sit with your back firmly against the lumbar support. Slide the pan until there is exactly a 2 to 3-inch gap between the front edge of the seat and your calves.
- Success Checkpoint: You can fit exactly two to three fingers stacked horizontally in the gap behind your knees.
- Common Mistake: Pushing the seat pan entirely flush against the calves. This cuts off localized blood flow, increasing the risk of deep vein thrombosis (DVT) and causing lower leg numbness after just 30 minutes of sitting.
Step 3: Position Lumbar Support at Your Belt Line
Slide the lumbar support pad vertically along the backrest track until its deepest curve nests securely into the natural inward curve of your lower spine.
Locate your iliac crest (the top of your pelvis bones/belt line). The apex of the lumbar support should sit immediately above this line. If your chair features a lumbar depth dial (found on premium models like the Steelcase Gesture), rotate it to increase firmness until you feel a gentle, forward-pushing pressure that prevents your pelvis from rolling backward into a slouch.
- Success Checkpoint: When you fully relax your core muscles, the chair physically prevents your lower back from collapsing outward toward the wall behind you.
- Common Mistake: Positioning the lumbar pad too high (hitting the mid-back ribs) or too low (pushing against the glutes), which forces the spine into unnatural kyphosis.
Step 4: Configure Armrests to Relax Your Shoulders
Pull the armrest height triggers upward and adjust the vertical position until your forearms rest completely flush on the pads with your elbows bent at a 90-degree to 100-degree angle.
Your shoulders must remain fully relaxed—neither shrugging upward nor drooping downward to reach the pads. If your chair utilizes 3D or 4D armrests, pivot the pads inward by 10 to 15 degrees and slide them horizontally closer to your ribcage. This ensures your elbows do not flare outward like wings while you type.
- Success Checkpoint: When resting your arms on the pads, you feel zero muscular tension in your upper trapezius (the muscles between your neck and shoulders).
- Common Mistake: Adjusting armrests so high that you permanently shrug. If your armrests cannot lower enough to clear your desk edge without elevating your shoulders, remove them entirely with an Allen wrench.
Step 5: Set Tilt Tension for Dynamic Sitting
Rotate the tilt-tension knob (usually beneath the front of the seat) to calibrate the recline resistance to your exact body weight.
First, release the tilt-lock paddle to allow the backrest to swing freely. Turn the tension knob clockwise to stiffen the resistance, or counter-clockwise to loosen it. Lean back. You want to achieve a neutral resting recline angle between 100 degrees and 110 degrees. The chair should support your weight automatically—you should not have to engage your core to avoid falling backward, nor should you have to push forcefully with your legs to recline.
- Success Checkpoint: You can recline 10 degrees and stay perfectly balanced in that position while lifting your feet one inch off the floor.
- Common Mistake: Locking the chair completely upright at a rigid 90-degree angle. A 90-degree static posture maximizes intradiscal pressure on the lumbar spine. Unlocked, tension-balanced dynamic movement is biologically superior to locked rigidity.
Step 6: Calibrate to Your Desk and Monitor
Assess your physical alignment with your external hardware now that your body is supported by the chair.
Roll under your desk. Your forearms should transition from the armrests to the keyboard surface in a straight, perfectly horizontal line. Finally, look straight ahead. Your eyes should naturally hit the top one-third of your monitor screen. If they do not, raise or lower the monitor independently. Do not alter your chair’s height to fix a monitor height issue.
- Success Checkpoint: You can type for 10 minutes without bending your wrists upward (extension) or dropping your chin to view your screen.
Common Mistakes and How to Fix Them
- Numbness in Thighs or Legs: The seat pan is too deep or the chair is too high. Check the 3-inch knee gap. If your chair lacks a seat slider and is naturally too deep (common for petite users under 5’4″), strap an external lumbar pillow to the backrest. This pushes your torso forward, artificially shortening the seat depth.
- Lower Back Pain After 2 Hours: Your lumbar support is likely dropping over time or your tilt tension is too loose, causing you to slump. Raise the lumbar pad by one inch. If your chair lacks built-in depth control, tighten the tilt tension knob by two full rotations to keep the backrest from giving way under your resting weight.
- Shoulder Tension and Neck Cramps: Your armrests are either too high or too far apart. Lower them until your shoulders drop naturally. If your desk is fixed and forces you to raise your arms to type, raise the chair 2 inches, deploy a footrest, and ensure the armrests align with the desk surface.
- The “Shirt-Tail Pull” Effect: If leaning back in your chair pulls your shirt out of your pants or lifts your feet off the floor, you are using a basic center-tilt chair. Upgrade to a “Synchro-Tilt” mechanism (which reclines the back at a 2:1 ratio to the seat) to keep your feet planted during movement.
Variations by Chair Mechanism
How long this process takes—and exactly what you can adjust—depends entirely on your chair’s underlying mechanical hardware:
| Mechanism Type | How It Works | Key Specs & Target Metrics | Adjustment Timeframe |
| Basic Task Chair | Simple up/down gas cylinder. Backrest is fixed or uses a manual hand-screw lock. | Seat Height: 16″–21″ | 1–2 minutes. Limited ergonomic value. |
| Multifunction / Tilt-Lock | Independent levers for seat pan angle and backrest angle. | Seat Angle: -5° to +10° | 10–15 minutes. High risk of locking in a poor posture. |
| Synchro-Tilt | Backrest and seat pan recline synchronously at a 2:1 ratio. | Tilt Angle: 90°–130° | 5–10 minutes. The standard for premium office setups (e.g., Herman Miller Aeron). |
| Weight-Activated | Reads user weight and counterbalances recline force automatically. | Auto-Tension calibration | Under 1 minute. Ideal for shared hot-desking. |
Frequently Asked Questions
How high should my office chair be for gaming vs. office work?
The biomechanical rules of height (knees at 90°–110°) do not change between gaming and office work. However, gamers who lean forward intensively should engage a forward seat-tilt lock (locking the pan at a -5° downward angle) to open the hips and reduce lower back strain during active focus.
Should my office chair have a headrest?
Headrests are strictly optional for standard typing, as a 100° recline supports the neck naturally. They become necessary for tall users (over 6’1″) or workers who spend over 40% of their day in a heavy recline (120°+) consuming media or taking phone calls.
What if I am too short for standard office chairs?
Petite users (under 5’4″) often suffer from seat pans that exceed 16 inches in depth, preventing them from using the backrest. You must purchase a chair explicitly spec’d with a “short cylinder” gas lift and a compact seat pan depth starting at 15 inches or less to prevent leg numbness.
To finalize how to adjust an office chair successfully, remember that static posture—even a perfect one—eventually causes fatigue. Use these adjustments to establish your baseline, then rely on an unlocked tilt mechanism to keep your spine moving throughout the day.