
A cable management box is a specialized, flame-retardant enclosure designed to hide power strips, surge protectors, and messy electrical cords. By routing wires through side slots and sealing the unit with a lid, it transforms chaotic cable tangles into a clean, geometric shape while protecting connections from dust, pets, and accidental unplugging.
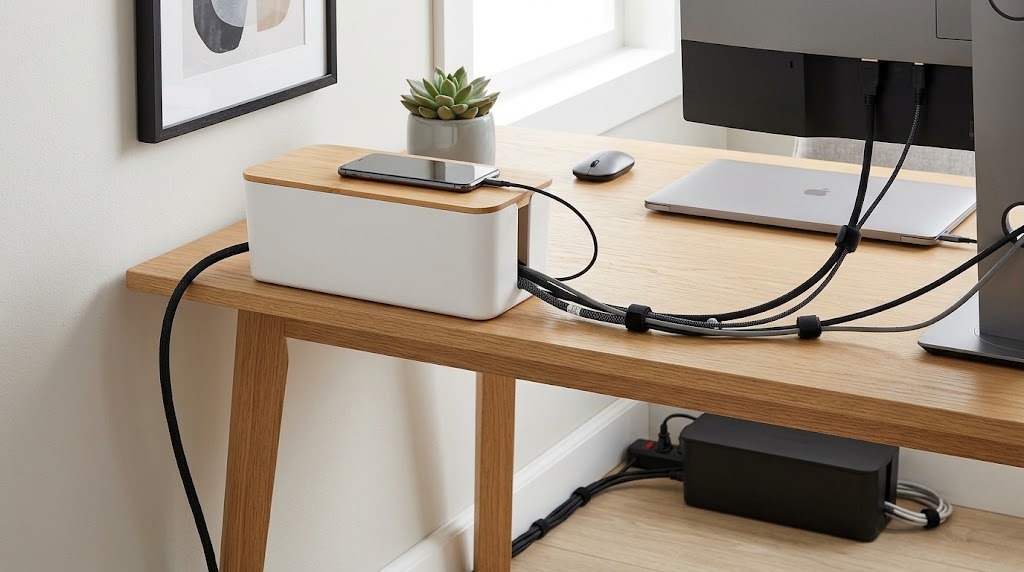
Key Facts:
- Lifespan: A high-quality enclosure features no moving mechanical parts and typically lasts 10 to 15 years.
- Installation Time: Complete setup requires 15 to 30 minutes, utilizing basic hook-and-loop (Velcro) cable ties.
- Sizing Rule: Box dimensions must exceed the power strip length by at least 2 to 3 inches (5 to 8 cm) to allow proper cable clearance.
- Cost: Entry-level plastic floor enclosures cost $10 to $20, while premium wood and heavy-duty steel mounts range from $25 to $45.
- Safety: Proper ventilation is mandatory; enclosing too many high-draw AC adapters without airflow causes thermal overloading.
How Does a Cable Management Box Work?
A cable management box works through three distinct mechanical functions: volume isolation, routing control, and concealment. The enclosure houses the bulkiest elements of electrical clutter—specifically the surge protector and individual power bricks (AC adapters).
Cables entering from the wall outlet pass through a specialized slot on one end, connect to the internal power strip, and the outbound cords feeding your computer or peripherals exit through the opposite slot. The removable lid seals the internal volume, trapping the tension of bundled cables inside. This mechanism prevents cords from sprawling across the floor, reducing trip hazards and shielding live electrical components from liquid spills and physical impacts.
Types of Cable Management Boxes
Cable boxes vary widely based on material construction, mounting location, and thermal design. Choosing the correct variant depends entirely on the physical environment of your workstation or entertainment center.
1. Standard Plastic Floor Boxes
Standard plastic boxes are molded from High-Impact Polystyrene (HIPS) or ABS plastic and sit flat on the floor or desk surface. High-quality versions are rated with the UL 94 V-0 flammability standard, ensuring the material will self-extinguish within 10 seconds if a spark occurs.
- Dimensions: Typically available in Small (10.6″ x 4.7″ x 4.3″ / fits 4-outlet strips), Medium (12.5″ x 5.1″ x 5.1″ / fits 6-outlet strips), and Large (15.7″ x 6.3″ x 5.3″ / fits 12-outlet strips).
- Price: $10 to $20 USD.
- Verdict: Choose this for affordable, zero-installation concealment behind TV stands or under traditional office desks.
2. Under-Desk Mount Trays
Under-desk trays are wire mesh or solid steel enclosures that screw directly into the underside of a wooden or composite desktop. They keep all electrical hardware completely off the floor, usually supporting between 10 to 20 pounds of weight.
- Dimensions: Ranging from 16 to 34 inches in width; depth typically requires 4 to 6 inches of vertical clearance.
- Price: $20 to $40 USD.
- Verdict: Choose this for height-adjustable standing desks and PC gaming setups to keep wires away from feet and vacuum cleaners.
3. Decorative Wood and Bamboo Boxes
Decorative boxes utilize real wood grains or solid bamboo lids designed specifically for high-visibility areas. They prioritize aesthetic integration over raw capacity, often featuring routed ventilation slots hidden in the base design to maintain airflow.
- Dimensions: Similar to medium plastic boxes, but generally heavier (1.5 to 3 lbs).
- Price: $25 to $45 USD.
- Verdict: Choose this for living room media consoles, nightstands, and entryways where industrial plastic would clash with furniture.
4. Multi-Tier Component Enclosures
Multi-tier enclosures feature internal shelves or physical dividers that separate high-voltage power lines (120V AC) from low-voltage data cables (Ethernet, HDMI, DisplayPort). This physical separation prevents Electromagnetic Interference (EMI), which can degrade internet speeds or monitor refresh rates.
- Dimensions: Significantly taller, often exceeding 8 inches in height.
- Price: $35 to $60 USD.
- Verdict: Choose this for complex server racks, home networking hubs, or professional video editing bays.
Cable Management Box Comparison
| Type | Pros | Cons | Best Application |
| Plastic Floor Box | Affordable, lightweight, zero tools required, easy to wipe clean. | Collects floor dust; looks basic/industrial. | Standard home offices, behind living room TV stands. |
| Under-Desk Mount | Frees up floor space; moves with standing desks; vacuum-friendly. | Requires drilling/mounting tools; harder to access quickly. | Ergonomic workstations, hardcore PC gaming setups. |
| Wood / Bamboo | Highly aesthetic; blends with premium home decor. | More expensive; heavier; wood can scratch over time. | Visible media centers, bedroom nightstands. |
| Multi-Tier Box | Reduces signal interference; organizes massive cable volumes. | Bulky footprint; highest price point. | Network hubs, audio/video production desks. |
How Do You Install a Cable Management Box?
Installing a cable management box correctly prevents cable damage and ensures maximum device safety.
Before You Start
- Time Required: 15 to 30 minutes.
- Difficulty: Beginner.
- Materials Needed: Cable management box, hook-and-loop (Velcro) straps, label maker or masking tape, tape measure.
Step 1: Power Down and Unplug
Turn off and unplug all electronic devices from the power strip, and unplug the power strip from the wall. Working with live wires during cable routing introduces unnecessary shock hazards.
Step 2: Position the Power Strip
Place your empty power strip inside the cable management box. Align the strip’s main heavy-duty cord so that it exits directly through one of the side slots toward your wall outlet without bending sharply.
Step 3: Label and Plug in Heavy Adapters
Plug in your largest AC power adapters (laptop chargers, monitor bricks) first. Label each cord roughly two inches from the plug using masking tape or a label maker. You will know this step is complete when you can identify every device without tracing the wire out of the box.
Step 4: Bundle Excess Cord Length
Gather the slack of each cable and fold it back and forth horizontally. Tie the bundle neatly using a hook-and-loop strap, and tuck the bundled slack into the open voids next to the power strip. Never tightly coil wires in a circle, as this creates a magnetic field and retains heat.
Step 5: Route the Outbound Wires
Thread the remaining length of the device cables out through the opposite slot of the box. Group these outbound cables together with one final Velcro strap as they exit to create a single “trunk” line leading up to your desk or television.
Step 6: Secure the Lid and Verify Clearances
Firmly snap or place the lid onto the box. Double-check the perimeter to ensure no small wires are pinched against the rim. Plug the main power strip back into the wall outlet and turn it on.
Choosing the Right Solution for Your Setup
Different environments demand specific wire management solutions. Match your hardware to your primary use case to avoid functional friction.
- For the Remote Corporate Worker: Opt for a Medium or Large Plastic Box Set. Remote workers benefit from placing a large box on the floor for monitors and docking stations, and a smaller secondary box on the desk surface for phone chargers and temporary peripherals.
- For the Hardcore PC Gamer: Choose an Under-Desk Steel Mount Tray. Gamers constantly swap peripherals (mice, keyboards, headsets), and standing desk users require wires to move cleanly up and down without snagging on stationary floor boxes.
- For the Living Room Minimalist: Go with a Solid Bamboo Cable Box. Place it directly on the media console next to the television or Wi-Fi router to elegantly mask flashing lights and blocky power cords without ruining the room’s aesthetic.
- For Parents and Pet Owners: Use a Plastic Box with a Child-Proof Snap Lid. A tight-fitting lid acts as a vital physical barrier, preventing toddlers from pulling on live wires and stopping pets (especially cats and rabbits) from chewing through hazardous AC insulation.
What Are the Most Common Installation Mistakes?
Improperly organizing a cable box can damage your hardware and create fire risks. Avoid these specific failure modes.
Mistake 1: Thermal Overloading
Cramming too many high-draw power bricks (gaming laptops, console power supplies) into a single box generates trapped heat. If the ambient temperature inside the box exceeds safe operating limits, the adapters will throttle power or fail entirely.
- The Fix: Perform the 30-minute test. After 30 minutes of heavy device usage, touch the outside of the box. If it feels excessively hot to the touch, you must move one or two power bricks outside the box or switch to an open-air under-desk tray.
Mistake 2: Buying the Wrong Size Box
Purchasing a box that exactly matches the length of the surge protector leaves zero room for the thick, stiff cords curving out from both ends of the strip.
- The Fix: Always measure your power strip and explicitly add at least 5 to 8 cm (2 to 3 inches) of interior clearance on each side when selecting a box size.
Mistake 3: Forcing the Lid on Pinched Cables
Jamming a bulky cord layout inside and forcing the lid shut violates the cables’ minimum bend radius. Over time, this pinches the internal copper wiring, degrading data signals and wearing through the rubber insulation.
- The Fix: Use Velcro ties to flatten bundles horizontally next to the strip rather than stacking them vertically on top of the plugs.
Frequently Asked Questions
Can a cable management box catch on fire?
A cable management box will not spontaneously catch fire, but if overloaded with faulty, overheating power bricks, it can melt. Always purchase boxes made from ABS plastic rated with the UL 94 V-0 flame-retardant standard, which prevents the material from sustaining combustion.
Do cable management boxes reduce electrical interference?
Standard single-chamber boxes do not reduce electrical interference. However, multi-tier boxes that physically separate high-voltage AC power cables from low-voltage HDMI or Ethernet cables will reduce electromagnetic interference (EMI), improving data transfer stability.
How do you clean a cable management box?
Unplug the main power strip from the wall before cleaning. Use a dry microfiber cloth or a handheld vacuum with a brush attachment to remove dust from the exterior vents and lid. Never use liquid chemical sprays near the slotted openings where live plugs reside.
Can you mount a standard plastic cable box to a wall?
Most standard plastic floor boxes are not designed for wall mounting and lack reinforced screw holes. To mount power strips to a wall, purchase a specialized wall-mounted cable shroud or an under-desk steel tray, as drilling through standard plastic boxes can compromise their structural integrity.