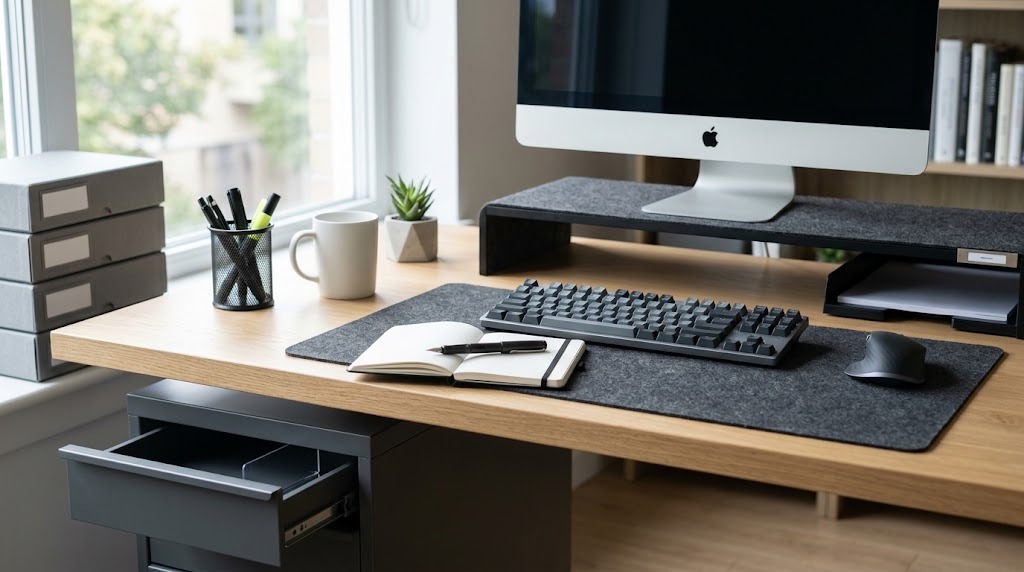
A clutter-free desk is an intentionally organized workspace optimized to minimize physical and visual distractions. By reducing the volume of non-essential objects competing for your brain’s attentional resources, this minimalist setup lowers cognitive load, decreases anxiety, and immediately increases operational focus.
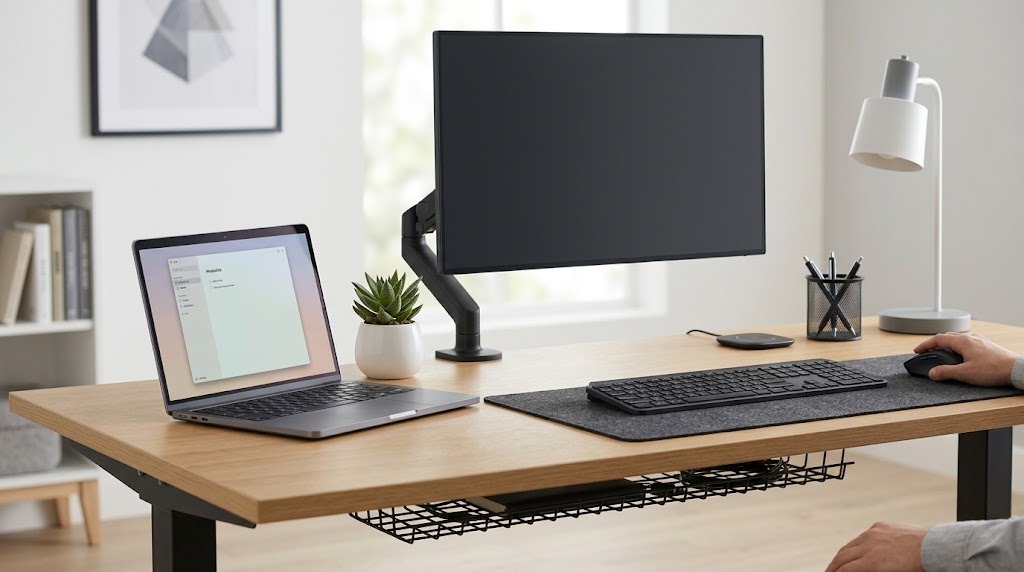
Key Facts / At a Glance:
- Psychological impact: Physical clutter directly drains working memory capacity by forcing the brain to constantly filter out irrelevant visual stimuli.
- Setup timeframe: Transitioning a standard workstation to a zero-clutter baseline typically takes 1 to 3 hours.
- Core rule: The “One-Touch Audit” mandates that only items used daily deserve permanent placement on the desktop surface.
- Cable management: Complete wire concealment requires under-desk mounting, using trays with a minimum 4-inch depth to accommodate standard power bricks.
- Maintenance: Sustaining the setup requires a 5-minute weekly reset, preventing the natural re-accumulation of paper and coffee cups.
Why Does a Clutter-Free Desk Improve Focus?
A clutter-free desk improves focus by physically manipulating cognitive load theory. Every object in your peripheral vision—loose papers, stray cables, extra pens—requires a micro-fraction of your brain’s processing power to register and ignore. When you remove these non-essential items, your brain reallocates those attentional resources back to your primary task, functionally expanding your working memory.
Furthermore, visible clutter triggers the Zeigarnik effect. A stack of ungraded papers or unpaid bills serves as a continuous visual reminder of incomplete tasks, artificially elevating cortisol (stress) levels. By moving these items into closed drawers or digital systems, you sever the visual cue, immediately sharpening your operational focus.
What Are the Main Desk Setup Typologies?
Workspace design generally falls into three philosophies. Choose the framework that matches your professional output; forcing a minimalist setup on a power-user workflow inevitably results in functional failure.
1. The Minimalist
- Core Components: Laptop, single monitor arm, wireless peripherals, felt desk pad.
- Target User: Writers, executives, general knowledge workers.
- Typical Cost: $50 – $150 (excluding core tech).
- Expert Recommendation: Rely on a unified USB-C docking station (like the CalDigit TS4) mounted under the desk. Connect your laptop to power, monitors, and peripherals using one single cable, allowing you to pack up in seconds.
2. The Power-User Tech Station
- Core Components: Dual/ultrawide monitors, audio interfaces, charging docks, macro pads.
- Target User: Software engineers, video editors, day traders.
- Typical Cost: $200 – $600+
- Expert Recommendation: Use a heavy-duty pneumatic monitor mount to lift your displays. This clears massive physical surface area beneath the screens for audio equipment or reference materials, preventing the desktop from feeling claustrophobic.
3. The Analog-Digital Hybrid
- Core Components: Tablet/laptop combo, desk organizers, dedicated sketch/notebook zones.
- Target User: Designers, architects, students.
- Typical Cost: $80 – $250
- Expert Recommendation: Introduce variable task lighting. Use a cool 4000K–5000K light for daytime digital focus, and switch to a warm 2700K–3000K color temperature to reduce eye strain during evening analog study blocks. Transition to digital note-taking platforms to aggressively reduce paper scraps.
How Do You Set Up a Clutter-Free Workspace?
Transforming a chaotic workspace into a clutter-free desk is a 6-step process requiring roughly 2 hours. The single factor that determines success is ruthless categorization during the audit phase—if you compromise on what constitutes a “daily essential,” the desk will re-clutter within a week.
Before You Start
- Time: 1 to 3 hours.
- Difficulty: Intermediate (requires basic cable routing).
- Cost: $0 to $50 (if purchasing basic cable management).
- Prerequisites: Microfiber cloths, multi-surface cleaner, a trash bag, and a physical inbox tray.
Step 1: The Full Purge
Clear everything off the desktop until you reach the bare surface. Disconnect all monitors, peripherals, and computers, and set them aside on the floor or a separate table. You cannot organize incrementally; you must break the current spatial habits completely.
Step 2: The Deep Clean
Take this rare opportunity to dust, wipe down, and sanitize the empty desktop surface. If you use a wooden desk, apply a basic wood conditioner. You’ll know this step is complete when the surface feels smooth and leaves no residue on your hands.
Step 3: The “One-Touch” Audit
Evaluate every item you removed. Categorize them into three strict piles: Daily Essentials (keyboard, mouse, primary notebook), Weekly/Occasional (reference books, staplers, external hard drives), and Trash/Belongs Elsewhere. Common mistake at this step: Keeping “just in case” items in the Daily Essentials pile.
Step 4: Strategic Re-Entry
Add items back one at a time, starting with the largest focal points (monitors and computer). Only return items to the surface if they survived the Daily Essentials audit. Position your monitor so the top bezel sits exactly at eye level.
Step 5: Route and Bind Cables
Before finalizing hardware positions, bundle your power and data lines. Group cables together and secure them beneath or behind the desk using hook-and-loop straps. If using a sit-stand desk, route all cables while the desk is at its maximum standing height to ensure sufficient slack.
Step 6: Digital Clean-Up
A clean physical desk is instantly undone by a messy screen. Delete unneeded desktop icons, organize your root folders, and clear out digital sticky notes into a unified note-taking app. Consolidate your digital environment to match the physical one.
Which Storage Strategy Works Best?
Deciding where to put the items that failed the “Daily Essentials” audit comes down to a trade-off between physical access and visual mass.
| Strategy | Pros | Cons | Ideal For |
| Surface Organizers (Trays, docks, cups) | Immediate physical access to tools; defines distinct zones. | Consumes actual desktop surface area; acts as a magnet for micro-clutter. | Pens, daily planners, and current project files. |
| Under-Desk Storage (Drawers, mounts, cabinets) | Achieves true “zero visual mass” on the surface; keeps items dust-free. | “Out of sight, out of mind” can lead to forgotten tools; requires bending/reaching. | External drives, reference books, staplers, and cables. |
Which Should You Choose?
Use surface organizers exclusively for items you touch more than three times a day. Everything else must go into under-desk storage.
What Are the Best Cable Management Solutions?
Cable management requires elevating wires off the floor and routing them along the desk’s frame. You need a combination of three specific tools to achieve a truly wireless look.
- Under-Desk Trays ($15 – $40): Wire mesh or steel J-channels screwed into the bottom of the desk. Crucial spec: Ensure the tray is at least 4 inches deep to comfortably hold bulky laptop power bricks and thick surge protectors.
- Magnetic Sleeves & Tracks ($20 – $50): These snap directly onto steel desk legs to route wires invisibly down to the wall outlet. They are the cleanest way to hide the vertical cable drop.
- Hook-and-Loop (Velcro) Straps ($5 – $10): Reusable ties that wrap cable bundles securely without damaging the insulation. Avoid zip-ties, which pinch data cables and require scissors to remove when you inevitably need to change a peripheral.
What Are the Most Common Organization Mistakes?
Even well-designed setups fail over time if you commit these common operational errors.
The “Junk Drawer” Trap
Shoving surface clutter into drawers without organizing them simply moves the chaos out of sight. The Fix: Use modular drawer dividers. Treat drawer real estate with the same strict zoning rules as the desktop surface.
Over-indexing on Aesthetics
Buying fragile or hyper-minimalist decor that looks great on social media but fails practical workflow needs (e.g., using a tiny decorative mousepad that ruins ergonomics). The Fix: Prioritize ergonomic angles and functional access over visual curation.
Cable Tension Failure
Forgetting to leave slack in cables when setting up a sit-stand desk results in ripped ports and damaged monitors when the desk is raised. The Fix: Always route, tie, and test cables while the standing desk is at its absolute maximum height.
The Re-accumulation Creep
Watching paper, mail, and coffee cups slowly take over the desk within a week of cleaning it. The Fix: Implement a “5-Minute Friday” ritual. Dedicate the exact last five minutes of your workweek to clearing mugs, filing papers, and resetting the desk to its absolute baseline.
Frequently Asked Questions
How do you hide laptop cables on a desk?
Hide laptop cables by routing them straight back off the rear edge of the desk into an under-desk wire tray. Use a single USB-C docking station mounted beneath the desk surface so only one cable needs to connect to the laptop itself.
Are desk pads worth the space?
Yes, desk pads (especially felt or leather) are highly functional. They visually anchor your keyboard and mouse, protect the desk surface from scratches, and improve acoustic dampening for mechanical keyboards without adding vertical clutter.
Where should a desktop tower go in a minimalist setup?
Mount the desktop tower underneath the desk using a heavy-duty CPU bracket, or place it on the floor on a wooden riser to avoid dust intake. Keeping the PC tower off the desk reclaims massive amounts of usable surface area.
How do I manage paper clutter effectively?
Implement a strict one-inbox rule. Place a single, shallow physical tray on your desk. All incoming paper goes there. Once a week, you must process the entire tray—digitize it, file it, or shred it—never letting it overflow.